Pages

Friday, October 6, 2017

WAMP and Wordpress Install on AWS Free Tier Windows 2012 R2

AWS provides a 750 hours free tier on Windows machine. I am always wondering how to install wordpress on it to use this free tier instance . Here is all steps I followed today. Most steps are same as WPMU DEV's post "Setting Up WordPress Locally for PC/Windows with WampServer". I do add some of my own experience in the steps.

Basically WampServer = (Apache, PHP, MySQL on Windows). WAMP is the software suite installed on popular Windows operate system, includes Apache, MySQL, PHP and some other tools. It is derived from LAMP which stands for Linux, Apache, MySQL, and PHP. As the name implies, while LAMP is used on Linux servers, WAMP is used on Windows servers.

Note: Microsoft WebPI is another popular way to install wordpress on Windows server. But truly not recommend. I managed to get it working and eventually still find WAMP is better and easier to use.


1. Install AWS Windows Instance

My previous post Launch and Access Amazon AWS EC2 Instances has detailed steps how to launch one. This time , I choose Microsoft Windows Server 2012 R2 Base. I have tried 2016 Base, but since it is only has 1G Ram and 1 virtual core, 2012 is better option. Also keep it in mind , it is 64bit version. Later if you need to install any software, it is best to get 64bit version to do installation. Follow screen, make sure choose right Network (VPC), right Subnet (Availability Zone) and enable auto-assign public ip. I always assign a static private ip for my instance. It is much convenient to do configuration later cross multiple instances.


2. RDP into your windows instance

RDP process is standard. After you decrypted your administrator password, you can RDP to it as long as your security group opened the port. I always create another user and put it into administrators group for future access. In this way, I do not have to decrypt my administrator password each time when I need to access windows machine.

3.  Download and install WampServer 

http://www.wampserver.com/en/ provides you download link. Make sure you are choosing WAMPServer 64 Bits (X64) version. It is 431M file. But download it from AWS instance is just one minute thing.


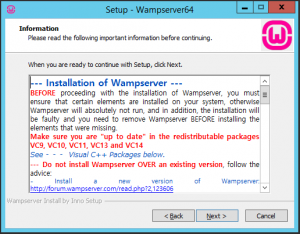
There is one thing you have to be very careful. Before start installation, you will need to install all suggested VC redistributable packages includes vc9, vc10, vc11, vc13 and vc 14.. All download links have been provided in the Setup Information page. You will have to install those VC redistributable packages to start some services later.

4. Launch Localhost site
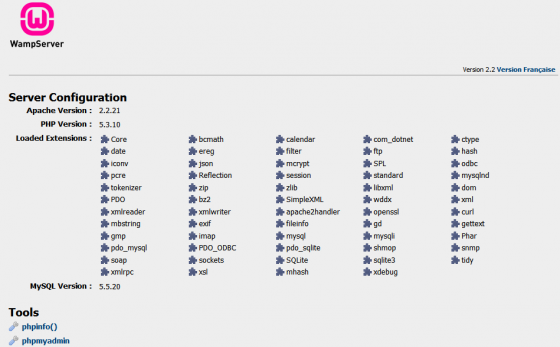
After installed WAMPServer, you should be able to see a green icon on your windows task bar notification area. open http://localhost page from your IE browser. It automatically load c:/wamp64/www/index.php file.

5. Install Wordpress
Download latest wordpress from https://wordpress.org.  Since I like wordpress be my homepage. I copied all extracted files into c:/wamp64/www folder, which is default Web Site folder created by installation of WAMPServer.

5.1 Create wordpress DB 
Launch PhpMyAdmin from http://localhost/phpmyadmin or from WAMPServer green icon.

By default, you can use root user to log in phpMyAdmin without password. Create a new database wordpress for your next step to install Wordpress.


Command line to create a MySql Database:
ubuntu@ip-10-10-0-50:~$ ping mysql2.c33rmuszoxid.us-west-2.rds.amazonaws.com
PING mysql2.c33rmuszoxid.us-west-2.rds.amazonaws.com (10.10.0.117) 56(84) bytes of data.
^C
--- mysql2.c33rmuszoxid.us-west-2.rds.amazonaws.com ping statistics ---
2 packets transmitted, 0 received, 100% packet loss, time 1006ms

ubuntu@ip-10-10-0-50:~$ sudo mysql -h 10.10.0.117 -u johnyan -p
Enter password:
Welcome to the MySQL monitor. Commands end with ; or \g.
Your MySQL connection id is 16
Server version: 5.6.35-log MySQL Community Server (GPL)

Copyright (c) 2000, 2017, Oracle and/or its affiliates. All rights reserved.

Oracle is a registered trademark of Oracle Corporation and/or its
affiliates. Other names may be trademarks of their respective
owners.

Type 'help;' or '\h' for help. Type '\c' to clear the current input statement.

mysql>
mysql> create database wordpress;
Query OK, 1 row affected (0.00 sec)

mysql> show databases;
+--------------------+
| Database |
+--------------------+
| information_schema |
| innodb |
| mysql |
| performance_schema |
| sys |
| wordpress |
| wp |
+--------------------+
7 rows in set (0.00 sec)

mysql> use wordpress;
Database changed


5.2 Configure Wordpress to connect MySql Database

use wordpad or notepad to open wp-config.php file under the folder c:/wamp64/www. change DB_Name, DB_User and DB_Password to the one as show below.

// ** MySQL settings - You can get this info from your web host ** //
/** The name of the database for WordPress */
define('DB_NAME', 'wordpress');

/** MySQL database username */
define('DB_USER', '
root');

/** MySQL database password */
define('DB_PASSWORD', '
');
/** MySQL hostname */
define('DB_HOST', 'localhost');
There is no change on DB_HOST name since wordpress will only need to connect to local MySql. If you are using remote MySQL, that will be your remote DB server's ip address or DNS name.


Use your IE browser to open http://localhost page again. You will get wordpress welcome page :

Enter site title and username / password which will be used to manage your wordpress site. Then you can click Install WordPress button to finish the whole wordpress installation process.


6. Publish Your Own Site to Internet
Now you have installed Wordpress site and it is working fine at http://localhsot this link. How about your own domain such as my netsec.51sec.org. How to get it working with your own domain?

6.1 Get your instance public ip and registered with your domain provider.
From AWS console, you should be able to get an automatically assigned public ip address. This public ip will change each time when you stop or reboot your windows instance. There is no problem if you just use it temporary. Or if you intend to keep it same all the time,  you can get a fixed Elastic IP for free. In my test environment, 34.214.8.80 is one I got as temporary one.

My domain provider is GoDaddy. Under doamin 51sec.org, I added one A record netsec which value is 34.214.8.80. In this way, all request to netsec.51sec.org will be translated to public ip 34.214.8.80, which is my AWS windows instance.

6.2 Open your firewalls. 
There are two firewalls. One is security group on AWS EC2 console. You will need to allow http (tcp 80) opened for 0.0.0.0/0.
Second is local windows firewall which is inside your windows server.

6.3 WAMP Configuration Change for Public Access
Open httpd-vhosts.conf by left one click WAMPServer green icon:
Change ServerName and Server Alias from localhost to netsec.51sec.org.
Also change Require to all granted

# Virtual Hosts
#
<VirtualHost *:80>
ServerName netsec.51sec.org
ServerAlias netsec.51sec.org

DocumentRoot "${INSTALL_DIR}/www"
<Directory "${INSTALL_DIR}/www/">
Options +Indexes +Includes +FollowSymLinks +MultiViews
AllowOverride All
Require all granted
</Directory>
</VirtualHost>


6.4. Restart All Services from WAMPServer green icon. 

6.5. Change WordPress SiteURL and home Configuration
Since your wordpress was configured to use localhost, the siteurl and home configuration is set to http://localhost. They will need to change to http://netsec.51sec.org.

7. Make WAMP services Start Automatically

7.1 Log in as an administrator.
7.2 Start -> Run "services.msc"
7.3 Right click the service wampapache (may also be called wampapache64). Go to properties and set start-up type to 'Automatic'
If you want MySQL to also be available on startup, then repeat step 3 for  wampmysqld  (or  wampmysqld64)


That is it. Now you should be able to get a published Wordpress site with your own domain name. AWS free tier windows 2012 R2 base server is enough to host a wordpress site with a couple of thousand visitors per day.  

References:


Google Blogger Usage Tips and Tricks


Here are some collections for bloggers from my pas blogger experience:


1. Adjust Right Sidebar margin width

Sometimes, the space between main body posts section and right side bar is too wide. You may want to change it from 40px to 10 px. Here is the code I found from here:

#sidebar-right-1{
position
: relative;
left
: 40px !important;
}
Add the code to Blogger Them Designer - Advanced - Add CSS section as show below.


2. Add youtube Playlist into blogger


2.1 Generate html code from your youtube playlist


2.2 Add html code into your Blogger layout
It is best to put code between <center> and </center> to get better center location in your page.


<center><iframe width="560" height="315" src="https://www.youtube.com/embed/videoseries?list=PLg7bL1bMpwPXUwb-BsLKolf42uWa0_nfY" frameborder="0" allowfullscreen></iframe></center>

3. Add Third Party Domain 

Blogger Domain Settings

GoDaddy CNAME Setting


4. Redirect Blogspot Site from One to Another
During migrating my site from 51sec.blogspot.com to 91sec.blogspot.com, I have found following ways to do redirection from one blogspot site to another.  The code will be inserted between <head> and </head>

a.  This is current way I am using and found it is best so far.
<script>
var oldURL = "51sec.blogspot.com";
var newURL = "91sec.blogspot.com";
var url = location.href;
var newURL = url.replace(document.domain,newURL);
window.location = newURL
</script>

b. It will only redirect all posts or pages to the homepage site, not passing url parameters.
<meta content='0;url=http://91sec.blogspot.com' http-equiv='refresh'/>

c.  The code works on some of URLs but some were got messed up.
<script type='text/javascript'>
  var d='<data:blog.url/>';
  d=d.replace(/.*\/\/[^\/]*/,'');
  location.href='http://91sec.blogspot.com'+d;
</script>


References:

Saturday, September 30, 2017

Ubuntu LAMP and WordPress Installation

I have selected Ubuntu as OS platform to install my php, wordpress and mysql. It gave me lots of learning experience on Linux. Here is many steps I recorded during working on my 51sec.org blog site.

1. Configure Interfaces

Welcome to Ubuntu 15.10 (GNU/Linux 4.2.0-16-generic x86_64)

 * Documentation:  https://help.ubuntu.com/

48 packages can be updated.
37 updates are security updates.

Last login: Sat Feb 13 20:16:03 2016 from 192.168.2.62
john@ubuntu15:~$ cd /etc/network
john@ubuntu15:/etc/network$ sudo vi interfaces
[sudo] password for john: 

# This file describes the network interfaces available on your system
# and how to activate them. For more information, see interfaces(5).

source /etc/network/interfaces.d/*

# The loopback network interface
auto lo
iface lo inet loopback

# The primary network interface -- use DHCP 
auto eth0

iface eth0 inet dhcp

# The secondart network interface -- use static ip address
auto ens160
iface ens160 inet static
address 192.168.2.22
netmask 255.255.255.0
gateway 192.168.2.1
dns-nameserver 8.8.8.8
~

~
john@ubuntu15:/etc/network$sudo /etc/init.d/networking restart


2. System Software Update

sudo apt-get update        # Fetches the list of available updates
sudo apt-get upgrade       # Strictly upgrades the current packages
sudo apt-get dist-upgrade  # Installs updates (new ones)

sudo nano /etc/apache2/apache2.conf   #add a single line "ServerName server_domain_or_IP "to the biottom of  /etc/apache2/apache2.conf file to suppress a warning message. 
sudo apache2ctl configtest
sudo systemctl restart apache2

Check Firewall to make sure allow inbound traffic for 80 and 443

ubuntu@ip-10-10-0-60:~$ sudo ufw app list
sudo: unable to resolve host ip-10-10-0-60
Available applications:
  Apache
  Apache Full
  Apache Secure
  OpenSSH
ubuntu@ip-10-10-0-60:~$ sudo ufw app info "Apache Full"
sudo: unable to resolve host ip-10-10-0-60
Profile: Apache Full
Title: Web Server (HTTP,HTTPS)
Description: Apache v2 is the next generation of the omnipresent Apache web
server.

Ports:
  80,443/tcp
ubuntu@ip-10-10-0-60:~$ sudo ufw allow in "Apache Full"
sudo: unable to resolve host ip-10-10-0-60
Rules updated
Rules updated (v6)
ubuntu@ip-10-10-0-60:~$ sudo ufw app info "Apache Full"
sudo: unable to resolve host ip-10-10-0-60
Profile: Apache Full
Title: Web Server (HTTP,HTTPS)
Description: Apache v2 is the next generation of the omnipresent Apache web
server.

Ports:

  80,443/tcp


john@ubuntu15:/etc/network$ cat /etc/*-release
DISTRIB_ID=Ubuntu
DISTRIB_RELEASE=15.10
DISTRIB_CODENAME=wily
DISTRIB_DESCRIPTION="Ubuntu 15.10"
NAME="Ubuntu"
VERSION="15.10 (Wily Werewolf)"
ID=ubuntu
ID_LIKE=debian
PRETTY_NAME="Ubuntu 15.10"
VERSION_ID="15.10"
HOME_URL="http://www.ubuntu.com/"
SUPPORT_URL="http://help.ubuntu.com/"
BUG_REPORT_URL="http://bugs.launchpad.net/ubuntu/"
john@ubuntu15:/etc/network$ 

john@ubuntu15:/etc/network$ uname -a

Linux ubuntu15 4.2.0-16-generic #19-Ubuntu SMP Thu Oct 8 15:35:06 UTC 2015 x86_64 x86_64 x86_64 GNU/Linux

3. Install LAMP

3.1. Install Apache

To install Apache you must install the Metapackage apache2. This can be done by searching for and installing in the Software Centre, or by running the following command.

sudo apt-get install apache2

3.2. Install MySQL
To install MySQL you must install the Metapackage mysql-server. This can be done by searching for and installing in the Software Centre, or by running the following command.

sudo apt-get install mysql-server
sudo mysql_install_db
sudo mysql_secure_installation


3.3. Install PHP

To install PHP you must install the Metapackages php5 and libapache2-mod-php5. This can be done by searching for and installing in the Software Centre, or by running the following command.
sudo apt-get install php libapache2-mod-php php-mcrypt php-mysql


3.4. Restart Server
Your server should restart Apache automatically after the installation of both MySQL and PHP. If it doesn't, execute this command.
sudo /etc/init.d/apache2 restart

3.5. Check Apache

Open a web browser and navigate tohttp://localhost/. You should see a message saying It works!

3.6. Check PHP

You can check your PHP by executing any PHP file from within /var/www/. Alternatively you can execute the following command, which will make PHP run the code without the need for creating a file .
john@ubuntu15:/etc/network$ php -r 'echo "\n\nYour PHP installation is working fine.\n\n\n";'

Your PHP installation is working fine.


ubuntu@ip-10-10-0-60:~$php -i

ubuntu@ip-10-10-0-60:~$sudo nano /var/www/html/info.php
<?php
phpinfo();
?>

http://your_server_IP_address/info.php


4. Install Phpmyadmin (Optional)

$ sudo apt-get install phpmyadmin

follow configuration wizard to finish the configuration, such as choosing :

  • apache2 for your web server
  • yes for Configure database for phpmyadmin with dbconfig-common?
  • MySQL application password for phpmyadmin:
  • password for root user Password of the database's administrative user:  


5. Install Wordpress
5.1 Install
cd ~
wget http://wordpress.org/latest.tar.gz
tar xzvf latest.tar.gz
sudo apt-get update
sudo apt-get install php5-gd libssh2-php


5.2 Configure
ubuntu@ip-10-10-0-60:~$ cd ~/wordpress
ubuntu@ip-10-10-0-60:~/wordpress$ cp wp-config-sample.php wp-config.php
ubuntu@ip-10-10-0-60:~/wordpress$ curl -s https://api.wordpress.org/secret-key/1.1/salt/
define('AUTH_KEY', '/c|BO/-!OU8+unm:*{r.iZD/7.Ayge],.Unawgno^!%(=p@#U7fdW#3Q<hcq<&/e');
define('SECURE_AUTH_KEY', '5d;:+VIC&Lh6-F>IoYk6eQag=n,;/KB9^589o|Ou)_N-_yb;Bo7$t,}?Uc 4rtgO');
define('LOGGED_IN_KEY', '=/lVrQ?h6yt(yYi9VS=1kZehJ67z4o]bg{dO-jIXl*r8h~3qeUd9BK6!3|#@;.!2');
define('NONCE_KEY', 'HuHK`7HwsW7|jvAXY(AXWFYcWmbvW2-xwNw[HXM0nu?4P.GATiYXZhLsAiaqoF<N');
define('AUTH_SALT', '!qV`*1GT;dRH-Zf6Ylwa*I]]|Y/seeoHqc*-:N11xi.!<d8X|<bA`4ot-2oJrmNO');
define('SECURE_AUTH_SALT', '+TgB6l[^8LgLp65);+PtT2DYideMa>UD=SJZ2jD`Aaqz_dR1E@2r>;i:X1JLU{`g');
define('LOGGED_IN_SALT', 'R`~Rhkuzz}v|OM|<$JSjkBd,~y/fsePw[q6:hH>GR{u``I/pmRa_]BkG%g(@K36x');
define('NONCE_SALT', 'C305sfDZGO5~J3XLDp|QLw2]4QYZ1B/#UM[pC6Lt+tvkBi]9pl-k^]e6Cw$,DM1(');
ubuntu@ip-10-10-0-60:~/wordpress$
ubuntu@ip-10-10-0-60:~/wordpress$ nano wp-config.php


5.3 Connect database
Change :
// ** MySQL settings - You can get this info from your web host ** //
/** The name of the database for WordPress */
define('DB_NAME', 'wordpress');

/** MySQL database username */
define('DB_USER', 'wordpressuser');

/** MySQL database password */
define('DB_PASSWORD', 'password');


5.4 Copy Files to /var/www/html and Change Permission


sudo rsync -avP ~/wordpress/ /var/www/html/
cd /var/www/html

sudo chown -R ubuntu:www-data *
mkdir /var/www/html/wp-content/uploads
sudo chown -R :www-data /var/www/html/wp-content/uploads


5.5 Web Interface Installation


6. Allow Remote Wordpress Connection to Mysql
6.1 Change MySql bind interface:

ubuntu@ip-10-1-1-50:/etc/mysql/mysql.conf.d$ netstat -ntlp | grep 3306
(Not all processes could be identified, non-owned process info
will not be shown, you would have to be root to see it all.)
tcp 0 0
127.0.0.1:3306 0.0.0.0:* LISTEN -
ubuntu@ip-10-1-1-50:/etc/mysql/mysql.conf.d$ vi mysqld.cnf
.....
# Instead of skip-networking the default is now to listen only on
# localhost which is more compatible and is not less secure.
# bind-address = 127.0.0.1
bind-address = 0.0.0.0

#
.....

ubuntu@ip-10-1-1-50:/etc/mysql/mysql.conf.d$ sudo /etc/init.d/mysql restart
sudo: unable to resolve host ip-10-1-1-50
Restarting mysql (via systemctl): mysql.service.
ubuntu@ip-10-1-1-50:/etc/mysql/mysql.conf.d$ netstat -ntlp | grep 3306
(Not all processes could be identified, non-owned process info
will not be shown, you would have to be root to see it all.)
tcp 0
0 0.0.0.0:3306 0.0.0.0:* LISTEN -

6.2 Allow a new user with remote machine name or public ip to access Mysql DB

ubuntu@ip-10-1-1-50:/etc/mysql/mysql.conf.d$ sudo mysql -u root -p mysql
sudo: unable to resolve host ip-10-1-1-50
Enter password:
Reading table information for completion of table and column names
You can turn off this feature to get a quicker startup with -A

Welcome to the MySQL monitor. Commands end with ; or \g.
Your MySQL connection id is 74
Server version: 5.7.19-0ubuntu0.16.04.1 (Ubuntu)

Copyright (c) 2000, 2017, Oracle and/or its affiliates. All rights reserved.

Oracle is a registered trademark of Oracle Corporation and/or its
affiliates. Other names may be trademarks of their respective
owners.

Type 'help;' or '\h' for help. Type '\c' to clear the current input statement.


mysql>
create user 'remotewordpressuser'@'ec2-34-215-22-243.us-west-2.compute.amazonaws.com' identified by '1234567890';
ERROR 1396 (HY000): Operation CREATE USER failed for 'remoteuser'@'ec2-34-215-22-243.us-west-2.compute.amazonaws.com'


mysql>
GRANT ALL ON *.* to remoteordpressuser@'ec2-34-215-22-243.us-west-2.compute.amazonaws.com' identified by '1234567890';
Query OK, 0 rows affected, 1 warning (0.00 sec)


mysql>
flush privileges;
Query OK, 0 rows affected (0.01 sec)

mysql> exit
Bye
ubuntu@ip-10-1-1-50:/etc/mysql/mysql.conf.d$
[root@ip-10-10-0-50 html]# mysql -h 50.40.50.80 -u remotewordpressuser -p
Enter password:
ERROR 1130 (HY000): Host 'ec2-34-215-22-243.us-west-2.compute.amazonaws.com' is not allowed to connect to this MySQL server
[root@ip-10-10-0-50 html]#
[root@ip-10-10-0-50 html]# mysql -h 50.40.50.80 -u remotewordpressuser -p
Enter password:
Welcome to the MySQL monitor. Commands end with ; or \g.
Your MySQL connection id is 82
Server version: 5.7.19-0ubuntu0.16.04.1 (Ubuntu)

Copyright (c) 2000, 2017, Oracle and/or its affiliates. All rights reserved.

Oracle is a registered trademark of Oracle Corporation and/or its
affiliates. Other names may be trademarks of their respective
owners.

Type 'help;' or '\h' for help. Type '\c' to clear the current input statement.

mysql>


[root@ip-10-10-0-50 html]# cp wp-config.php wp-config.php.old
[root@ip-10-10-0-50 html]#
vi wp-config.php

<?php
/**
* The base configuration for WordPress
*
* The wp-config.php creation script uses this file during the
* installation. You don't have to use the web site, you can
* copy this file to "wp-config.php" and fill in the values.
*
* This file contains the following configurations:
*
* * MySQL settings
* * Secret keys
* * Database table prefix
* * ABSPATH
*
* @link https://codex.wordpress.org/Editing_wp-config.php
*
* @package WordPress
*/

// ** MySQL settings - You can get this info from your web host ** //
/** The name of the database for WordPress */
define('DB_NAME', '
wordpress');

/** MySQL database username */
define('DB_USER', '
remotewordpressuser');

/** MySQL database password */
define('DB_PASSWORD', '
1234567890');

/** MySQL hostname */
define('DB_HOST', '
50.40.50.80');

/** Database Charset to use in creating database tables. */
define('DB_CHARSET', 'utf8mb4');

/** The Database Collate type. Don't change this if in doubt. */
define('DB_COLLATE', '');

/**#@+


Note:
a. Stop Mysql service and Disable it Auto Run when rebooted

ubuntu@ip-10-10-0-55:/var/log/apache2$ vmstat -s
1014648 K total memory
310308 K used memory
390732 K active memory
143836 K inactive memory
414364 K free memory
15576 K buffer memory
274400 K swap cache
0 K total swap
0 K used swap
0 K free swap
675 non-nice user cpu ticks
0 nice user cpu ticks
608 system cpu ticks
157804 idle cpu ticks
1517 IO-wait cpu ticks
0 IRQ cpu ticks
15 softirq cpu ticks
527 stolen cpu ticks
205823 pages paged in
23372 pages paged out
0 pages swapped in
0 pages swapped out
97824 interrupts
160060 CPU context switches
1506783521 boot time
1623 forks
ubuntu@ip-10-10-0-55:/var/log/apache2$
sudo service mysql stop
sudo: unable to resolve host ip-10-10-0-55
ubuntu@ip-10-10-0-55:/var/log/apache2$ vmstat -s
1014648 K total memory
154184 K used memory
235852 K active memory
132412 K inactive memory
581604 K free memory
15648 K buffer memory
263212 K swap cache
0 K total swap
0 K used swap
0 K free swap
696 non-nice user cpu ticks
0 nice user cpu ticks
612 system cpu ticks
167728 idle cpu ticks
1523 IO-wait cpu ticks
0 IRQ cpu ticks
15 softirq cpu ticks
528 stolen cpu ticks
207123 pages paged in
23868 pages paged out
0 pages swapped in
0 pages swapped out
101681 interrupts
167164 CPU context switches
1506783521 boot time
1657 forks
ubuntu@ip-10-10-0-55:/var/log/apache2$
sudo nano /etc/init/mysql.conf
sudo: unable to resolve host ip-10-10-0-55

GNU nano 2.5.3 File: /etc/init/mysql.conf

description "MySQL 5.7 Server"
author "Mario Limonciello <superm1@ubuntu.com>"

#start on runlevel [2345]
stop on starting rc RUNLEVEL=[016]

respawn
respawn limit 2 5

env HOME=/etc/mysql
umask 007

# The default of 5 seconds is too low for mysql which needs to flush buffers
kill timeout 300


b. Stop Apache2 Service and Disable it Auto Run when rebooted
  1. systemctl command – Only works on systemd based Ubuntu like version 16.04 LTS and above.
  2. /etc/init.d/apache2 – A sys v init style script to start / stop / restart the Apache2 service under Debian or Ubuntu Linux.
  3. service command – This command work in most Linux distributions including Debian and Ubuntu.
  4. upstart command – Only works on certain version of Ubuntu.
  5. apache2ctl command – This method should work on all Linux and Unix likeoperating systems.
$ lsb_release -a
$ sudo systemctl stop apache2.service
$ sudo systemctl status apache2.service

$ sudo apt-get install rcconf
$ sudo rcconf


7. Install free https certificate 
https://letsencrypt.org/ provides free ssl/tls certificate for popular application platform using Certbot ACME client to simplify the whole process.


$ sudo apt-get update
$ sudo apt-get install software-properties-common
$ sudo add-apt-repository ppa:certbot/certbot
$ sudo apt-get update
$ sudo apt-get install python-certbot-apache


$ sudo certbot --apache


Reference:


Friday, September 29, 2017

Basic Linux Commands (Tips and Tricks)

1. Basic Commands

man : manual
ls :List Directory Contents
pwd :print working directory
cd :change directory
mkdir :Make directory
cp :Copy
mv :Move
find and locate and whereis
kill
passwd :Password
md5sum :Compute and Check MD5 Message Digest
history :History (Event) Record。
sudo :(super user do)
touch :Update the access and modification times of each FILE to the current time
chmod :change file mode bits
chown :change file owner and group
apt :Advanced Package Tool
dd: Convert and Copy a file
       root@linux:~# dd if=/home/user/Downloads/debian.iso of=/dev/sdb1 bs=512M; sync
tar : Tape Archive
cal : Calendar
cat : Concatenation. Concatenate (join) two or more plain file and/or print contents of a file on standard output.
grep : searches the given file for lines containing a match to the given strings or words
ps : (Process)
service : command controls the Starting, Stopping or Restarting of a ‘service‘
df : disk usages of file system
du : disk usages
cmp : compare
wget : a free utility for non-interactive (i.e., can work in background) download of files from the Web
mount
gcc : is the in-built compiler for ‘c‘ language in Linux Environment.
g++ is the in-built compiler for ‘C++‘ , the first object oriented programming language.
Java is one of the world’s highly used programming language and is considered fast, secure, and reliable. Most of the the web based service of today runs on java.


    2. Iptable firewalls

    2.1 Delete IPtable firewall rules

    [root@Linux01p ~]# /sbin/iptables -L -v -n
    Chain INPUT (policy ACCEPT 0 packets, 0 bytes)
     pkts bytes target     prot opt in     out     source               destination         
      74M   53G RH-Firewall-1-INPUT  all  --  *      *       0.0.0.0/0            0.0.0.0/0           

    Chain FORWARD (policy ACCEPT 0 packets, 0 bytes)
     pkts bytes target     prot opt in     out     source               destination         
        0     0 RH-Firewall-1-INPUT  all  --  *      *       0.0.0.0/0            0.0.0.0/0           

    Chain OUTPUT (policy ACCEPT 18M packets, 1069M bytes)
     pkts bytes target     prot opt in     out     source               destination         

    Chain RH-Firewall-1-INPUT (2 references)
     pkts bytes target     prot opt in     out     source               destination         
     5462  734K ACCEPT     all  --  lo     *       0.0.0.0/0            0.0.0.0/0           
    46700 2228K ACCEPT     icmp --  *      *       0.0.0.0/0            0.0.0.0/0           icmp type 255 
        0     0 ACCEPT     esp  --  *      *       0.0.0.0/0            0.0.0.0/0           
        0     0 ACCEPT     ah   --  *      *       0.0.0.0/0            0.0.0.0/0           
        0     0 ACCEPT     udp  --  *      *       0.0.0.0/0            224.0.0.251         udp dpt:5353 
        0     0 ACCEPT     udp  --  *      *       0.0.0.0/0            0.0.0.0/0           udp dpt:631 
      719 34592 ACCEPT     tcp  --  *      *       0.0.0.0/0            0.0.0.0/0           tcp dpt:631 
      63M   52G ACCEPT     all  --  *      *       0.0.0.0/0            0.0.0.0/0           state RELATED,ESTABLISHED 
     3094  150K ACCEPT     tcp  --  *      *       0.0.0.0/0            0.0.0.0/0           state NEW tcp dpt:22 
      10M 1029M REJECT     all  --  *      *       0.0.0.0/0            0.0.0.0/0           reject-with icmp-host-prohibited

    [root@Linux01p ~]# /sbin/service iptables save
    Saving firewall rules to /etc/sysconfig/iptables: [  OK  ]
    [root@Linux01p ~]# /sbin/service iptables stop
    Flushing firewall rules: [  OK  ]
    Setting chains to policy ACCEPT: filter [  OK  ]
    Unloading iptables modules: [  OK  ]
    [root@Linux01p ~]# /sbin/iptables -L -v -n
    Chain INPUT (policy ACCEPT 0 packets, 0 bytes)
     pkts bytes target     prot opt in     out     source               destination      

    Chain FORWARD (policy ACCEPT 0 packets, 0 bytes)
     pkts bytes target     prot opt in     out     source               destination      

    Chain OUTPUT (policy ACCEPT 0 packets, 0 bytes)
     pkts bytes target     prot opt in     out     source               destination      
    [root@Linux01p ~]# /sbin/service iptables start
    Flushing firewall rules: [  OK  ]
    Setting chains to policy ACCEPT: filter [  OK  ]
    Unloading iptables modules: [  OK  ]
    Applying iptables firewall rules: [  OK  ]
    Loading additional iptables modules: ip_conntrack_netbios_ns [  OK  ]

    Or we can use the following command or script to stop the rules:


    #!/bin/sh
    echo "Saving current firewall rules at /root/current.firewall file..."
    iptables-save > /root/current.firewall
    echo "Stopping firewall and allowing everyone..."
    iptables -F
    iptables -X
    iptables -t nat -F
    iptables -t nat -X
    iptables -t mangle -F
    iptables -t mangle -X
    iptables -P INPUT ACCEPT
    iptables -P FORWARD ACCEPT
    iptables -P OUTPUT ACCEPT

    2.2. Changing Debian IPTABLES Rules To Survive Reboot
    2.2.1. iptables scripts to enhance the rules at /usr/local/scripts/rc.iptables during a reboot
    Linux1~# cat /etc/init.d/iptables
    #!/bin/sh
    #
    IPTABLES_CONFIG=/usr/local/scripts/rc.iptables
    PATH=/usr/bin:/bin:/sbin:/usr/sbin:/usr/local/bin:/usr/local/sbin

    if [ ! -x /sbin/iptables ]; then
            exit 0
    fi

    start() {
            if [ -f $IPTABLES_CONFIG ]; then
                iptables -F
                iptables -X
                echo $"Applying iptables firewall rules: "
                $IPTABLES_CONFIG
                echo
                touch /var/lock/subsys/iptables
            fi
    }

    stop() {
            iptables -P INPUT ACCEPT
            iptables -P OUTPUT ACCEPT
            iptables -P FORWARD ACCEPT
            iptables -F
            iptables -X
            echo
            rm -f /var/lock/subsys/iptables
    }

    case "$1" in
      start)
            start
            ;;

      stop)
            stop
            ;;

      restart)
            start
            ;;
      *)
            echo $"Usage: $0 {start|stop|restart}"
            exit 1
    esac

    exit 0

    Linux1~# vi /usr/local/scripts/rc.iptables

    Linux1~# /etc/init.d/iptables restart

    Linux1~#iptables -L -v -n | more


    2.2.2. using iptables-restore and iptables-save to edit iptables rules
    iptables-save > /etc/iptables.test.rule

    editor /etc/iptables.test.rule
    iptables-restore < /etc/iptables.test.rule
    iptables-save > /etc/iptables.up.rule
    editor /etc/network/if-pre-up.d/iptables

    Add these lines to iptables file:
                      #!/bin/sh
                      /sbin/iptables-restore < /etc/iptables.up.rule

    The iptables file under 
    /etc/network/if-pre-up.d/ needs to be executable so change the permissions:
                        chmod +x /etc/network/if-pre-up.d/iptables

    Note: What I found is in some old Debian system, method b does not work. But method a works all the time.

    3. User and Group

    [root@Linux01p ~]# useradd test1
    [root@Linux01p ~]# passwd test1
    Changing password for user test1.
    New UNIX password:
    Retype new UNIX password:
    passwd: all authentication tokens updated successfully.

    [root@Linux01p ~]# usermod -a -G root test
    [root@Linux01p ~]# id test
    uid=501(test) gid=501(test) groups=501(test),0(root) context=root:system_r:unconfined_t:s0-s0:c0.c1023
    [root@Linux01p ~]# groups
    root bin daemon sys adm disk wheel
    [root@Linux01p ~]# users
    root root
    [root@Linux01p ~]# groupadd network

    [root@Linux01p ~]# groups
    root bin daemon sys adm disk wheel
    [root@Linux01p ~]# cat /etc/group
    root:x:0:root,test,test1
    test:x:501:
    test1:x:502:
    network:x:503:
    [root@Linux01p ~]# cat /etc/passwd
    root:x:0:0:root:/root:/bin/bash
    xfs:x:43:43:X Font Server:/etc/X11/fs:/sbin/nologin
    test1:x:502:502::/home/test1:/bin/bash

    4. Change Interface IP Address 
    • Temporary:
      • ifconfig eth1 192.168.2.50 netmask 255.255.255.0 up
    Restart the networking service, enter:
    # /etc/init.d/network restart

    5. Fold and Disk Commands

    [root@Linux01p var]# rm -r dbbackup/ -f
    [root@Linux01p var]# df -h
    Filesystem            Size  Used Avail Use% Mounted on
    /dev/hda3             7.6G  7.3G     0 100% /
    /dev/hda1             244M   12M  219M   6% /boot
    tmpfs                 504M     0  504M   0% /dev/shm
    /dev/hdb1             197G  197G     0 100% /data

    [root@Linux01p var]# du -s
    4779468 .

    6. Cron Job

    [admin@ss ~]$ sudo su -
    Password:
    [root@ss ~]# crontab -l
    @daily scp -r find /var/netscreen/dbbackup/ -mtime -1 -type d -print root@10.4.1.4:/data
    @daily mv /root/CP_MGMT_*.tgz /data/backup/cp/

    [root@ss ~]# crontab -e
    [root@ss ~]# 

    There are 5 fields before the actual command:
    field                   allowed values
    -----                   --------------
    minute               0-59
    hour                  0-23
    day of month    1-31
    month               1-12 (or names)
    day of week      0-7 (0 or 7 is Sun, or use names)

    Run a command once/week scheduled Saturday morning at 6am:

    0 6 * * sat /path/to/command
    or
    0 6 * * 6 /path/to/command

    Note: Website crontab.guru to write a proper cron job . https://wdt.io/ can provide cron job monitor service. For example, reboot httpd service every four hour: 

    [root@ip-10-10-0-50 log]# vi /etc/crontab 

    SHELL=/bin/bash
    PATH=/sbin:/bin:/usr/sbin:/usr/bin
    MAILTO=root
    HOME=/

    # For details see man 4 crontabs

    # Example of job definition:
    # .---------------- minute (0 - 59)
    # | .------------- hour (0 - 23)
    # | | .---------- day of month (1 - 31)
    # | | | .------- month (1 - 12) OR jan,feb,mar,apr ...
    # | | | | .---- day of week (0 - 6) (Sunday=0 or 7) OR sun,mon,tue,wed,thu,fri,sat
    # | | | | |
    # * * * * * user-name command to be executed
    0 */4 * * * root sudo service httpd restart && curl -sm 30 k.wdt.io/admin@gmail.com/reboot_httpd_4h?c=0_*/4_*_*_*

    7. Create SSH Trust Relationship between two Linux Machines

    Become root:
    sudo su - 

    Change to user nsm:
    su nsm 

    Go to the /home/nsm directory:
    cd /home/nsm 

    Create the keys: (Path should be /home/nsm/.ssh/id_rsa. Leave the passphrase blank.)
      ssh-keygen -t rsa

      Secure copy the public key to the other server as the admin user: (use admin password)
        scp /home/nsm/.ssh/id_rsa.pub admin@<ipAddressOfOtherServer>:/home/admin/authorized_keys
        • or Go to the remote server. The command below will add the key that is in temp1 file to the end of the authorized_keys file.
        cat temp1 >> authorized_keys
        • Repeat steps 2-6 on  deviceB.   On deviceB, become root: (from user nsm, exit to root). Move the authorized_keys file that was copied to admin into nsm/.ssh:
        mv /home/admin/authorized_keys /home/nsm/.ssh/authorized_keys
        • Change ownership of authorized_keys: 
        chown nsm:nsm /home/nsm/.ssh/authorized_keys
        • At this point, you will be able to SSH between both servers without it asking for a password.
        ssh root@172.218.68.33

        8. Find Big Files in Linux File System 

        • find . -type f -size +10000 -exec ls -lh {} \; 
        • find . -type f -size +50000k -exec ls -lh {} \; | awk '{ print $9 ": " $5 }'
        • Find large files (>10M) in current folder
        • find . -type f -size +10000k 

        9. Find Out My Linux Distribution Name and Version


        [root@Linux01p ~]# cat /etc/*-release
        Red Hat Enterprise Linux Server release 5.5 Beta (Tikanga)

        [root@Linux01p ~]# cat /proc/version
        Linux version 2.6.18-186.el5 (mockbuild@ls20-bc2-13.build.redhat.com) (gcc version 4.1.2 20080704 (Red Hat 4.1.2-46)) #1 SMP Wed Jan 27 18:14:15 EST 2010

        Linux1:~# cat /proc/version
        Linux version 2.6.26-2-amd64 (Debian 2.6.26-27) (dannf@debian.org) (gcc version 4.1.3 20080704 (prerelease) (Debian 4.1.2-25)) #1 SMP Wed Sep 21 03:36:44 UTC 2011


        [root@Linux01p ~]# lsb_release -a
        LSB Version:    :core-3.1-ia32:core-3.1-noarch:graphics-3.1-ia32:graphics-3.1-noarch
        Distributor ID: RedHatEnterpriseServer
        Description:    Red Hat Enterprise Linux Server release 5.5 Beta (Tikanga)
        Release:        5.5
        Codename:       Tikanga

        Linux1:~# lsb_release -a
        No LSB modules are available.
        Distributor ID: Debian
        Description:    Debian GNU/Linux 5.0.9 (lenny)
        Release:        5.0.9
        Codename:       lenny

        uname = (Unix Name),

        [root@Linux01p ~]# uname -a
        Linux Linux01p 2.6.18-186.el5 #1 SMP Wed Jan 27 18:14:15 EST 2010 i686 i686 i386 GNU/Linux

        [root@Linux01p ~]# uname -mrs
        Linux 2.6.18-186.el5 i686


        10. Troubleshooting Linux System Issue with Vmstat Command


        [Expert@CP:0]# vmstat 2 |awk '{now=strftime("%Y-%m-%d %T "); print now $0}'
        2014-10-29 09:26:47 procs -----------memory---------- ---swap-- -----io---- --system-- -----cpu------
        2014-10-29 09:26:47  r  b   swpd   free   buff  cache   si   so    bi    bo   in   cs us sy id wa st
        2014-10-29 09:26:47  1  0 448004  10748   1928 126520   10   13    53   581  118  155  8 11 81  1  0
        2014-10-29 09:26:49  1  0 448004  10748   1936 126520    0    0     0    84 1123 2197  5 10 84  0  0
        2014-10-29 09:26:51  1  0 448004  10780   1936 126520    0    0     0     0 1123 2145  3  6 92  0  0
        2014-10-29 09:26:53  1  0 448004  10500   1944 126512    0    0     0    82 1123 2204  6 13 82  0  0
        2014-10-29 09:26:55  1  0 448004  10500   1944 126520    0    0     0     0 1125 2139  6 11 84  0  0
        2014-10-29 09:26:58  3  0 448004  10484   1944 126520    0    0     0     0 1123 2112  6 10 84  0  0


        The ‘procs’ field has 2 columns:
            r – The number of processes waiting for run time.
            b – The number of processes in uninterruptible sleep (blocked processes).

        The ‘memory’ field has 4 columns: (see with vmstat -a)
            swpd – The amount of used swap space(virtual memory) used.
            free – The amount of idle memory(free RAM).
            inact – The amount of inactive memory.
            active – The amount of active memory.

        The ‘swap’ field has 2 columns:
            si – Amount of memory swapped in from disk (/s).
            so – Amount of memory swapped to disk (/s).

        The ‘io’ field has 2 columns:
            bi – Blocks received from a block device (blocks in).
            bo – Blocks sent to a block device (blocks out).

        The ‘system’ field has 2 columns:
            in – The number of interrupts per second, including the clock (System interrupts).
            cs – The number of context switches per second (Process context switches).

        The ‘cpu’ field has only 4 columns:
            us: Time spent running non-kernel code. (user time, including nice time).
            sy: Time spent running kernel code. (system time).
            id: Time spent idle.
            wa: Time spent waiting for IO.


        CPU slow1:
            r has numbers in it constantly, threads/tasks waiting to be processed by your gimp cpu
        CPU slow2:
            in is high, you are handling too many interrupts (likely from disk activity, but could be bad driver)
        Processes:
            us or sy is high? Some process is being a cpu hog, use top -n 1 to find it, and kill -9 the PID if needed
        Disk Subsystem Overloaded:
            wa is high? If you are waiting for IO then you need to upgrade your disk subsystem
        Not Enough RAM:
            si and so are high, swapping disk too much. You really shouldn’t swap at all for high performance. If these are high, in will be high too. Upgrade your RAM.
        Low Memory2:
            cs is high? The kernel is paging memory in and out of context. Likely you need more RAM, but it could be other issues too such as damaged hardware or pitiful software.
        Out of Memory:
            I ignore free, inact, active because it’s not as useful and understanding the actual reasons. Ie: if you are out of memory, you’ll know that, but unless you look at cs, so, si, etc you won’t know why. So it’s redundant.

        11. Check Your Public IP Address from CLI

        • curl -s checkip.dyndns.org|sed -e 's/.*Current IP Address: //' -e 's/<.*$//'
        • curl icanhazip.com
        • telnet www.checkmyip.com 80 | grep confidence | grep -Eo '([0-9]{1,3}\.){3}[0-9]{1,3}'
        • wget -O - -q icanhazip.com
        • wget http://ipinfo.io/ip -qO -

        12. PS command

        Display the top 5 processes consuming most of the cpu:

        [Expert@CP]# ps aux --sort=-pcpu | head -5
        USER       PID %CPU %MEM    VSZ   RSS TTY      STAT START   TIME COMMAND
        admin     3935 14.9  1.0  33032 10344 ?        Ss   09:27   5:13 /bin/confd
        admin     3941  5.0 58.1 559724 556864 ?       Ss   09:27   1:46 /bin/monitord
        admin     4215  1.4  3.6 251040 35412 ?        Ssl  09:28   0:28 cpd

        admin     3937  0.7  0.2  26076  2808 ?        Ssl  09:27   0:15 /bin/searchd

        13. VI Command

        Cut and paste:

        • Position the cursor where you want to begin cutting.
        • Press v to select characters (or uppercase V to select whole lines).
        • Move the cursor to the end of what you want to cut.
        • Press d to cut (or y to copy).
        • Move to where you would like to paste.
        • Press P to paste before the cursor, or p to paste after.

        14. Check Hardware Info

        For CPU:
        $ cat /proc/cpuinfo
        $ lscpu

        For Memory :$ free -m (give you result by MB)
        $ cat /proc/meminfo

        For HDD:$ df -h (give you human readable result)
        $ sudo fdisk -l
        $ hdparm -i /dev/device (for example sda1, hda3...)


        15. Install a software on Linux


        For Red Hat/Fedora:
        $ yum install firefox

        If you are using Red Hat Enterprise Linux, it happens that the package you are looking for is in EPEL, so you can install that:
        sudo rpm -Uvh http://download.fedora.redhat.com/pub/epel/5/i386/epel-release-5-4.noarch.rpm

        and then you can:
        yum install ncdu.

        For Ubuntu ( run this as root ) :
        # apt-get install firefox

        For Debian/Ubuntu

        # aptitude install firefox


        16. Use ssh key to encrypt / decrypt files


        Create a file:
        echo ‘This is a sekret’ >/tmp/msg.txt

        Export public key:
        openssl rsa -in ~/private.pem -out /tmp/public.pub -outform PEM -pubout

        Encrypt file with public key (anyone can have this key):
        openssl rsautl -encrypt -inkey /tmp/public.pub -pubin -in /tmp/msg.txt -out /tmp/file.enc

        Decrypt the file with private key (only you should have the private key):
        openssl rsautl -decrypt -inkey ~/private.pem -in /tmp/file.enc -out /tmp/decrypted.txt

        Check decoded message:
        cat /tmp/decrypted.txt

        17. AWS Amazon Linux Instance Commands

        sudo yum update -y
        sudo yum install -y httpd24 php70 mysql56-server php70-mysqlnd
        sudo service httpd star


        sudo chkconfig httpd on
        chkconfig --list httpd
        curl http://localhost

        sudo usermod -a -G apache ec2-user
        groups
        sudo chown -R ec2-user:apache /var/www
        sudo chmod 2775 /var/www
        find /var/www -type d -exec sudo chmod 2775 {} \;
        find /var/www -type f -exec sudo chmod 0664 {} \;
        echo "<?php phpinfo(); ?>" > /var/www/html/phpinfo.php
        sudo yum list installed httpd24 php70 mysql56-server php70-mysqlnd
        sudo service mysqld start
        sudo chkconfig mysqld on
        sudo service httpd restart


        18. Change Time Zone

        Ubuntu
        ubuntu@ip-10-1-1-50:/var/log/apache2$ timedatectl list-timezones | grep Toronto
        America/Toronto
        ubuntu@ip-10-1-1-50:/var/log/apache2$
        sudo timedatectl set-timezone America/Toronto
        sudo: unable to resolve host ip-10-1-1-50
        ubuntu@ip-10-1-1-50:/var/log/apache2$
        date
        Fri Sep 29 22:09:11 EDT 2017


        AWS Linux/CentOS/RHEL 6/5 
        [ec2-user@ip-10-10-0-50 ~]$ sudo su
        [root@ip-10-10-0-50 ec2-user]#
        mv /etc/localtime /root/localtime.old
        [root@ip-10-10-0-50 ec2-user]#
        ln -s /usr/share/zoneinfo/America/Toronto /etc/localtime
        [root@ip-10-10-0-50 ec2-user]#
        date
        Fri Sep 29 22:11:00 EDT 2017
        [root@ip-10-10-0-50 ec2-user]#


        Reference: