Pages

Tuesday, May 6, 2014

Free SNMP Software Suit in Windows Environment - Net-SNMP (Snmpv3 Support)

I was looking for this kind of software for a while. Mostly desktop and servers I am using are windows based. There is no Snmpwalk this kind of command under windows OS. Good things, there are always some genius to see the gap and develop some gorgeous tools to meet the needs from the people like me.

Net-SNMP is one of this kind of software. Based on their website - http://www.net-snmp.org/
"
Net-SNMP is a suite of applications used to implement SNMP v1SNMP v2c and SNMP v3 using both IPv4 and IPv6. The suite includes:
  • Command-line applications to:
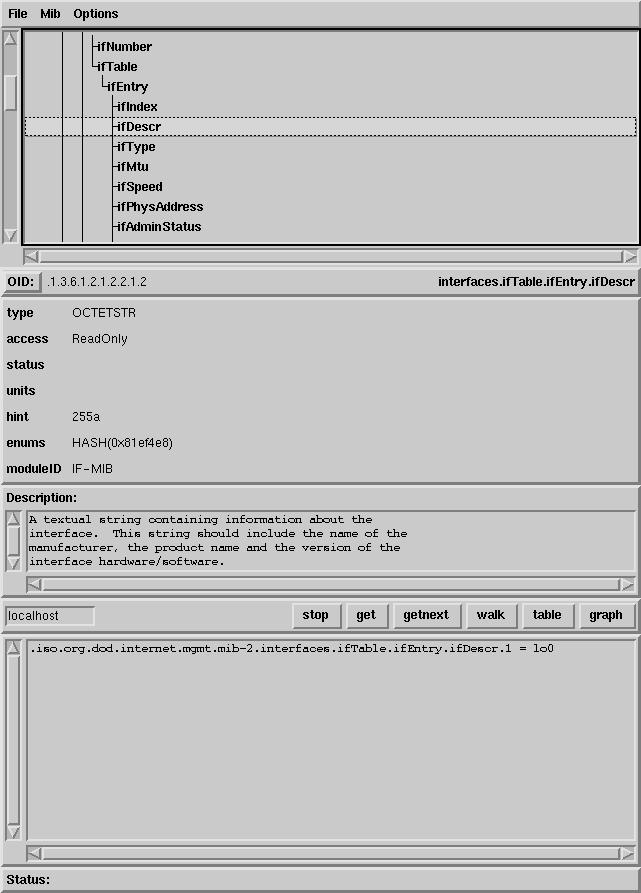
  • A graphical MIB browser (tkmib), using Tk/perl.
  • A daemon application for receiving SNMP notifications (snmptrapd). Selected notifications can be logged (to syslog, the NT Event Log, or a plain text file), forwarded to another SNMP management system, or passed to an external application.
  • An extensible agent for responding to SNMP queries for management information (snmpd). This includes built-in support for a wide range of MIB information modules, and can be extended using dynamically loaded modules, external scripts and commands, and both the SNMP multiplexing (SMUX) and Agent Extensibility (AgentX) protocols.
  • A library for developing new SNMP applications, with both C and perl APIs.
"
There is a tutorial page at http://www.net-snmp.org/wiki/index.php/Tutorials .

Here I would like to list some usage from my person experience.


1. Installation

a. Download it from http://sourceforge.net/projects/net-snmp/files/net-snmp/
current version is 5.7.2.1. Installation package for windows is net-snmp-5.6.1.1-1.x86.exe (4.2 MB)
b. Follow the installation guideline to complete the installation in the windows environment.
c. Verify the installation.

C:\usr\bin>snmpd -V
No log handling enabled - using stderr logging
Warning: no access control information configured.
  (Config search path: c:/usr/etc/snmp;c:/usr/share/snmp;c:/usr/lib)
  It's unlikely this agent can serve any useful purpose in this state.
  Run "snmpconf -g basic_setup" to help you configure the snmpd.conf file for th
is agent.
NET-SNMP version 5.6.1.1

2. SNMPv2

Seems like very straightforward.

C:\usr\bin>snmpwalk -v 2c -c SnmpPass 10.94.120.160 system
SNMPv2-MIB::sysDescr.0 = STRING: Juniper Networks, Inc. srx240h internet router,
 kernel JUNOS 11.4R10.3 #0: 2013-11-15 06:56:20 UTC     builder@singlath:/volume
/build/junos/11.4/release/11.4R10.3/obj-octeon/bsd/kernels/JSRXNLE/kernel Build
date: 2013-11-15 07:18:28 UTC Copyright (c) 199
SNMPv2-MIB::sysObjectID.0 = OID: SNMPv2-SMI::enterprises.2636.1.1.1.2.39
DISMAN-EVENT-MIB::sysUpTimeInstance = Timeticks: (43996634) 5 days, 2:12:46.34
SNMPv2-MIB::sysContact.0 = STRING:
SNMPv2-MIB::sysName.0 = STRING:
SNMPv2-MIB::sysLocation.0 = STRING:
SNMPv2-MIB::sysServices.0 = INTEGER: 4

3. SNMPv3

Not that easy when test SNMPv3 command.

Trying to test SNMPv3 but got 'Encryption support not enabled' error messages always:

C:\>snmpget -v3 -u NetService -l authPriv -x DES -a MD5 -A Password -X Password 10.94.16.11 SNMPv2-MIB::sysName.0

No log handling enabled - using stderr logging
Encryption support not enabled.
snmpget: USM encryption error

C:\>snmpd -H
No log handling enabled - using stderr logging
netsnmp_assert GetLastError() != 10093L failed ..\..\snmplib\winpipe.c:48
Warning: no access control information configured.
  (Config search path: c:/usr/etc/snmp;c:/usr/share/snmp;c:/usr/lib)
  It's unlikely this agent can serve any useful purpose in this state.
  Run "snmpconf -g basic_setup" to help you configure the snmpd.conf file for th
is agent.
Configuration directives understood:
  In snmpd.conf and snmpd.local.conf:
    authtrapenable           1 | 2              (1 = enable, 2 = disable)
    trapsink                 host [community] [port]
    trap2sink                host [community] [port]
.
.
.
    defSecurityName          string
    defContext               string
    defPassphrase            string
    defAuthPassphrase        string
    defPrivPassphrase        string
    defAuthMasterKey         string
    defPrivMasterKey         string
    defAuthLocalizedKey      string
    defPrivLocalizedKey      string
    defVersion               1|2c|3
    defAuthType              MD5|SHA
    defPrivType              DES (AES support not available)
    defSecurityLevel         noAuthNoPriv|authNoPriv|authPriv

It clearly shows DES is supported but not AES. Since we are using DES, where is the real problem. Actually, the cause for our error message is the option during installation, encryption support not being chosen.


Following packages have to be installed first to support this Encryption.
1. Microsoft Visual C++ 2008 Redistributable Package Please make sure use vcredist_x86.exe but not vcredist_x64.exe.
2. Win32 OpenSSL v1.0.1g Light (Win32OpenSSL_Light-0_9_8y.exe) , reboot system.
3. net-snmp-5.6.1.1-1.x86.exe (net-snmp-5.5.1-1.x86.exe)

There are lots of tricks here. First, you will have to install OpenSSL 0.9.8 this version based on the download page ,

"IMPORTANT NOTE FOR WINDOWS USERS: the Net-SNMP Windows binaries have been built with OpenSSL version 0.9.8r. Since the OpenSSL 0.9 and 1.0 DLLs are incompatible, any attempt to install Net-SNMP on a system where OpenSSL 1.0 has been installed will fail."

Second thing I spent tons of time to figure out is 5.5.1 version working fine but not 5.6.1.1 this latest version.

C:\Users\John>snmpwalk -v3 -u NetServices -l authPriv -x DES -a MD5 -A SnmpPass -X SnmpPass 10.94.16.11 SNMPv2-MIB::sysName.0
SNMPv2-MIB::sysName.0 = STRING: Switch2001

I feel lucky today!!!!!!

Sunday, May 4, 2014

GNS3 V1.0 Alpha for Linux in Vmware Workstation

Some Exciting GDS3 V1.0 Alpha feature from their website page, especially IOU Switching Support:

Alpha 2 Release - 16/04/14

  • New Dynamips IOS Support
  • Easy Idle PC Calculation and Configuration
  • IOS on UNIX Support
  • IOU Switching Support
  • Fast Topology Save and Load
  • Rapid Spanning-Tree


 1. VM Settings. Vmware Workstation has to be at least 10.0.


2. Login Window

username : root
password : cisco

username : gns3
password : cisco


3. Start GNS3 server and client

After log in with account gns3, open an terminal window and start gns3server first by entering following command
gns3@gns3-iouvm ~ $ su -
Password:  
gns3-iouvm ~ # cd gns3-server-master/
gns3-iouvm gns3-server-master # gns3server

Open another terminal window to start gns3 client:

gns3@gns3-iouvm ~ $ su -
Password: 
gns3-iouvm ~ # cd gns3-gui-master/
gns3-iouvm gns3-gui-master # gns3


4. IOU Upload Page


5. 设置GNS3自动启动

This is from the post of Netemu:
登录Linux后,点击左下角的“Menu“,再点击从上往下数第三个图标,选择系统设置。点击“Startup Programs”,再点击“Add”
添加开机启动:
内容
第一个:name: GNS3
Command: /usr/local/bin/gns3
Comment: GNS3 GUI
点击:“Save”

第二个:name : GNS3Server
Command: /usr/local/bin/gns3server
Comment : Gns3Server
点击:“Save”

再点击"Close"

设置完成后重新启动,就可以实现开机启动GNS3了。

Note: Thanks the following posts for downloading address. 


  1. (重磅炸弹)GNS3 V1.0 Alpha for Linux
  2. 升级到 GNS3 V1 Alpha 3


Thursday, May 1, 2014

Reset SonicWall NSA 4500 to Factory Default Configuration

SonicWall NSA 4500 is Next-Generation Firewall features integrate intrusion prevention, gateway
anti-virus, anti-spyware and URL filtering with application intelligence and control, and SSL decryption to
block threats from entering the network and provide granular application control without compromising performance.

Here is the steps to reset SonicWall to factory default configuration:

SonicWALL security appliance has a special SafeMode which allows you to quickly recover from uncertain configuration states with a simplified management interface that includes the same settings available on the System > Settings page.

Step 1. 

Connect your management station to a LAN port (NSA 4500 is X0 port) on the SonicWALL security appliance and configure you management workstation IP address to 192.168.168.20/24.


Step 2. 

Use a narrow, straight object, like a straightened paper clip or a toothpick, to press and hold the reset button on the back of the security appliance for five to ten seconds. The reset button is in a small hole next to the console port or next to the power supply, depending on your SonicWALL security appliance model. 
The Test light starts blinking when the SonicWALL security appliance has rebooted into SafeMode.

Step 3. 

Connect to the SonicWALL management interface: Point the Web browser on your Workstation to 192.168.168.168. The SafeMode management interface displays. Choose Current firmware with Factory Default Settings and boot device.


Step 4. 

After system rebooted and came back online, using browser navigator to http://192.168.168.168 and log into authentication page with following default username/password based on your SonicWall device model:
The following list provides the factory default administrator (admin) username, password and IP address for all categories of SonicWALL appliances.
 NOTE: All IP addresses listed are in the 255.255.255.0 subnet mask.
Product
Default Username
Default Password
Default IP Address
SonicWALL FIREWALL (UTM) APPLIANCES
admin
password
192.168.168.168
SonicWALL CONTENT SECURITY MANAGER (CSM) APPLIANCES
admin
password
192.168.168.168
SonicWALL SMB SSL-VPN APPLIANCES
admin
password
192.168.200.1
SonicWALL Aventail EX Series SSL-VPN Appliances
admin (AMC), 
root (CLI)
Defined during 
initial configuration.
192.168.0.10 
(on internal interface)
SonicWALL  EMAIL SECURITY APPLIANCES
admin
password
192.168.168.169
SonicWALL CONTINUOUS DATA PROTECTION (CDP) APPLIANCES
admin
password
192.168.168.169
SonicWALL SonicPoint appliance
admin
password
192.168.1.20

Step 5. 

Check the default configuration.


Friday, April 25, 2014

Cisco Switch Configuration to Make Multicast Load Sharing Working on Checkpoint ClusterXL Firewalls

Working on Checkpoint Cluster XL Load Sharing configuration, and found one blog post from Technopath LLC regarding Cisco switch configuration. It should be helpful for my next step.

The topology like this:


  1. Configure the following command on the internal router (usually it is layer 3 switch and 0100.5e16.0de2 is Internal Checkpoint VIP Multicast Mac Address):
    •  arp 192.168.20.2 0100.5e16.0de2 arpa  
  2. Configure the following commands on the internal switch where the port numbers shown below are the port numbers to which your firewall interfaces are connected:
    • mac address-table static 0100.5e16.0de2 vlan 10 interface gi1/0/2 gi1/0/3 gi1/0/4
    • no ip igmp snooping vlan 10
  3. The multicast mac address of the firewall cluster's internal VIP (shown above in the commands) is obtained by looking at the topology information of the cluster in the SmartDashboard and clicking on the edit option for the cluster IP and then clicking on the advanced button. That should show you the mulitcast MAC address. Checkpoint has an sk technote which shows a different way of getting the MAC address using the cphaconf debug_data command on the command line. This DOES NOT work as it gives you the wrong MAC address.
  4. The same configuration commands (with the correct IP and MAC for the external cluster) are performed on the external router pointing to the external VIP (0100.5e16.0de3 is Checkpoint External VIP Multicast Mac Address):
    •  arp 192.168.15.2 0100.5e16.0de3 arpa
  5. And the same configuration command on the external switch:
    • mac address-table static 0100.5e16.0de3 vlan 20 interface gi1/0/5 gi1/0/6 gi1/0/7
    • no ip igmp snooping vlan 20

Monday, April 21, 2014

Only Primary SRX Cluster Member Got IDP Signature Update from NSM with Virtual Chassis

1. Situation:

In my environment, there are a couple of SRX Clusters managed by NSM. NSM downloads IDP signature updates from Internet then push those updates to each SRX clusters. Most of SRX cluster members will get IDP signature updates except one pair managed by NSM through Virtual Chassis.

2. Symptoms:

For this pair SRX cluster which is managed by NSM through Virtual Chassis, always only primary cluster member get the signature update, not the secondary one. Even after failover, the secondary becomes primary, the NSM will think this pair SRX cluster has been updated to latest signature database then stop to push.

3. Solutions:


Juniper has a KB to manually sync the database between two cluster members. As long as you have one member got the signature database, the second one can be manually copied in and install it.


Step 1: Copy the signature from Primary folder to Secondary

root@fw-srx-2% rlogin -T node0
--- JUNOS 11.4R10.3 built 2013-11-15 06:56:20 UTC

root@fw-srx-2% ls -l /var/db/idpd/nsm-download/
total 75784
-rwxr-xr-x  1 root  wheel  23406109 Apr 20 15:04 SignatureUpdate.xml
-rwxr-xr-x  1 root  wheel    223243 Apr 20 15:04 application_groups.xml
-rwxr-xr-x  1 root  wheel     31953 Apr 20 15:05 application_groups2.xml.gz
-rwxr-xr-x  1 root  wheel   1678841 Apr 20 15:04 applications.xml
-rwxr-xr-x  1 root  wheel     11823 Apr 20 15:07 applications.xsd
-rwxr-xr-x  1 root  wheel    232937 Apr 20 15:06 applications2.xml.gz
-rwxr-xr-x  1 root  wheel   4413629 Apr 20 15:06 compiled_ai.bin2
-rwxr-xr-x  1 root  wheel     18360 Apr 20 15:06 contexts.xml.gz
-rwxr-xr-x  1 root  wheel       851 Apr 20 15:06 filters.xml.gz
-rwxr-xr-x  1 root  wheel   4067651 Apr 20 15:07 groups.xml
-rwxr-xr-x  1 root  wheel       753 Apr 20 15:07 heuristics.bin.gz
-rwxr-xr-x  1 root  wheel   1349960 Apr 20 15:07 libidp-detector.so.tgz.v
-rwxr-xr-x  1 root  wheel   3093356 Apr 20 15:04 libqmprotocols.tgz
-rwxr-xr-x  1 root  wheel       472 Apr 20 15:07 platforms.xml
-rwxr-xr-x  1 root  wheel     59327 Apr 20 15:05 products.xml.gz
-rwxr-xr-x  1 root  wheel       921 Apr 20 15:06 services.xml.gz
-rwxr-xr-x  1 root  wheel      2832 Apr 20 15:06 templates.xml.gz


root@fw-srx-2% rcp -r -T  /var/db/idpd/nsm-download/* node0:/var/db/idpd/nsm-download/
root@fw-srx-2% cli

root@fw-srx-1% cd /var/db/idpd/nsm-download/
root@fw-srx-1% ls -l
total 75784
-rwxr-xr-x  1 root  wheel  23406109 Apr 21 14:55 SignatureUpdate.xml
-rwxr-xr-x  1 root  wheel    223243 Apr 21 14:55 application_groups.xml
-rwxr-xr-x  1 root  wheel     31953 Apr 21 14:55 application_groups2.xml.gz
-rwxr-xr-x  1 root  wheel   1678841 Apr 21 14:56 applications.xml
-rwxr-xr-x  1 root  wheel     11823 Apr 21 14:56 applications.xsd
-rwxr-xr-x  1 root  wheel    232937 Apr 21 14:56 applications2.xml.gz
-rwxr-xr-x  1 root  wheel   4413629 Apr 21 14:56 compiled_ai.bin2
-rwxr-xr-x  1 root  wheel     18360 Apr 21 14:56 contexts.xml.gz
-rwxr-xr-x  1 root  wheel       851 Apr 21 14:56 filters.xml.gz
-rwxr-xr-x  1 root  wheel   4067651 Apr 21 14:57 groups.xml
-rwxr-xr-x  1 root  wheel       753 Apr 21 14:57 heuristics.bin.gz
-rwxr-xr-x  1 root  wheel   1349960 Apr 21 14:57 libidp-detector.so.tgz.v
-rwxr-xr-x  1 root  wheel   3093356 Apr 21 14:58 libqmprotocols.tgz
-rwxr-xr-x  1 root  wheel       472 Apr 21 14:58 platforms.xml
-rwxr-xr-x  1 root  wheel     59327 Apr 21 14:58 products.xml.gz
-rwxr-xr-x  1 root  wheel       921 Apr 21 14:58 services.xml.gz
-rwxr-xr-x  1 root  wheel      2832 Apr 21 14:58 templates.xml.gz
root@fw-srx-1% cp * /var/db/idpd/sec-download/


Step 2: Install the copied signature database

{primary:node1}
root@fw-srx-2> request security idp security-package install node 0 
node0:
root@fw-srx-1% clear--------------------------------------------
Will be processed in async mode. Check the status using the status checking CLI

{primary:node1}
root@fw-srx-2> request security idp security-package install status    
node0:
--------------------------------------------------------------------------
Done;AI installation failed! Attack DB update failed!

node1:
--------------------------------------------------------------------------
Ready to accept a new request

{primary:node1}
root@fw-srx-2> request security idp security-package install status    
node0:
--------------------------------------------------------------------------
Done;Attack DB update : not performed
      due to the same version between downloaded one and installed one.
     Updating control and data-plane with new detector : not performed
      due to the same detector version between downloaded  and installed one.

node1:
--------------------------------------------------------------------------
Done;Attack DB update : successful - [UpdateNumber=2373,ExportDate=Tue May 13 16:22:18 2014 UTC,Detector=12.6.160140207]
     Updating control-plane with new detector : successful

     Updating data-plane with new attack or detector : successful


{secondary:node0}
root@fw-twinsburg-srx-1> ...security idp security-package install status    
node0:
--------------------------------------------------------------------------
In progress:Installing AI ...

node1:
--------------------------------------------------------------------------
Done;Attack DB update : not performed
      due to the same version between downloaded one and installed one.
     Updating control and data-plane with new detector : not performed

      due to the same detector version between downloaded  and installed one.


{primary:node1}
root@fw-srx-2> show security idp policy-commit-status 
node0:
--------------------------------------------------------------------------
 IDP policy[/var/db/idpd/bins/fw-tw-20140109.bin.gz.v] and detector[/var/db/idpd/sec-repository/installed-detector/libidp-detector.so.tgz.v] loaded successfully.
 The loaded policy size is:350641 Bytes

node1:
--------------------------------------------------------------------------
 IDP policy[/var/db/idpd/bins/fw-tw-20140109.bin.gz.v] and detector[/var/db/idpd/sec-repository/installed-detector/libidp-detector.so.tgz.v] loaded successfully.
 The loaded policy size is:415603 Bytes

Step 3: verify the installation status

root@fw-srx-2% rlogin -T node0
--- JUNOS 11.4R10.3 built 2013-11-15 06:56:20 UTC

{secondary:node0}
root@fw-srx-1> ...security idp security-package install status    
node0:
--------------------------------------------------------------------------
In progress:performing DB update for an xml (SignatureUpdate.xml)

node1:
--------------------------------------------------------------------------
Ready to accept a new request


{secondary:node0}
root@fw-srx-1> ...security idp security-package install status    
node0:
--------------------------------------------------------------------------
Done;Attack DB update : successful - [UpdateNumber=2365,ExportDate=Wed Apr 16 19:07:52 2014 UTC,Detector=12.6.160140207]
     Updating control-plane with new detector : successful
     Updating data-plane with new attack or detector : successful

node1:
--------------------------------------------------------------------------
Ready to accept a new request

{secondary:node0}
root@fw-srx-1> show security idp security-package-version 
node0:
--------------------------------------------------------------------------

  Attack database version:2365(Wed Apr 16 19:07:52 2014 UTC)
  Detector version :12.6.160140207
  Policy template version :N/A

node1:
--------------------------------------------------------------------------

  Attack database version:2365(Wed Apr 16 19:07:52 2014 UTC)
  Detector version :12.6.160140207
  Policy template version :N/A