Pages

Sunday, March 1, 2015

Bridge Your Home Routers to Extend Your Wireless Network

Not sure how many home users are experiencing wireless router coverage issue. Your wireless home router is set at living room, but at the certain location of your home, the wireless signal is quite weak. It will be painful especially when you found this fact on the bed with your tablet devices. Upgrade a more powerful wireless routers, or buy another router repeater?Actually the router vendors have implemented a "bridge" technology which can enable wireless connection between multi-vendor's routers. Here is Wikepedia's explanation about Bridging (networking):
"Network bridging is the action taken by network equipment to create an aggregate network from either two or more communication networks, or two or more network segments. If one or more segments of the bridged network are wireless, it is known as wireless bridging. Bridging is distinct from routing, which allows multiple different networks to communicate independently while remaining separate."
This post is my weekend task to get my living room's wireless signal to cover the corner of my bed room better. In the bedroom's far end from wireless router's location, the signal is always not enough to keep my ipad/cell phone persistently connected. To stop my family's complain, I decided to set up secondary router as a bridge Access Point at second floor, which will provide strong signal to upper floors.

Topology:


1. Main Router's Configuration

Main router is from isp, and this Adsl device model is HG-A800. This router's configuration is not any special. You just need to enable wireless security, LAN network and DHCP. 

Wireless basic configuration:


Note: Channel should not be set to Auto since it may change after a reboot or power outage. After you find out current channel number such as 6 in this example, you will need to set it as current channel. Your bridge channel will be set it to same number manually. That will prevent lost connection between two routers. (updated Jul 12 2017)


 Wireless Security:

 LAN and DHCP Setup (LAN IP is 192.168.2.1):


2. Secondary Router's Configuration:

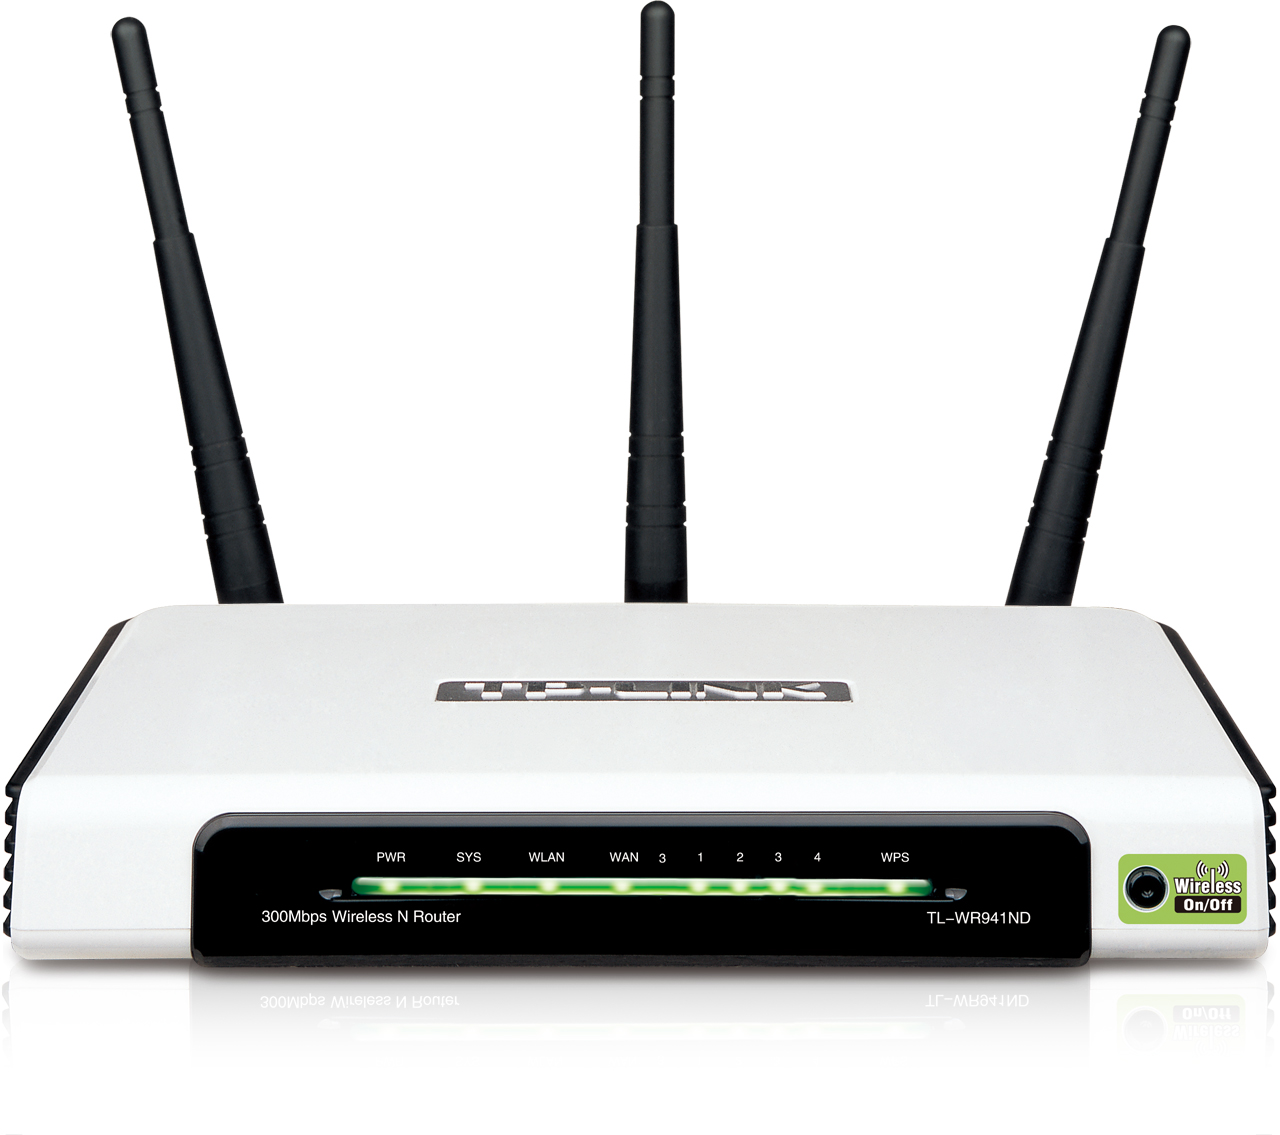
TP-LINK WR941ND is used as secondary router for bridge Access Point purpose. 

There is no connection on WAN port since it is secondary router which is not directly connecting to Internet. LAN port can be used to connect local network devices such as media player, game console or desktop.WAN configuration type for this secondary router will be Dynamic IP. LAN IP will be 192.168.2.2. DHCP Scope is from 192.168.2.151 to 192.168.2.199. As you tell, The DHCP Scope of Primary router and Secondary router is not overlapping, which is easier for us to identify which device your system is logged in by wireless later. 

The most important part is Wireless Settings in secondary router. You had better set up same wireless SSID and password  as Primary router, especially at SSID (to be bridged) section. 

Note. As you can see the channel is manually set to 6 to match your main router. 


3. Test Result

My ISP is providing 15 mbps downloading speed and 1 mbps uploading speed. From the speedtest.net's result, it shows pretty good result from Secondary router, almost no loss from this set up.


Thursday, February 26, 2015

Excel Formula: Search a Column of Strings to Match Another Column

Once a while, I have to work on Excel sheet manually. Today I have to search exported hundreds of ip addresses in a pre-defined excel spreadsheet to see if there is a match. It seems a easy work, but it took me almost an hour to find right formula.

Column O includes all exported ip addresses. I have to manually search if those column O's ip addresses are appearing in column B's text. If yes, which row is it?

Formula is set at Column N.

=MATCH("*"&(O6)&"*",B:B,0)

As you can see from cell N6, the number is 7, which means the text in B7 includes O6's string.
N12's number is 5, which means the test in B5 includes O12's string. 


Wednesday, February 25, 2015

Using PRTG SNMPv3 Monitoring Juniper SRX 240H Alarm andTemperature

One of our SRX240H is having temperature problem. Whenever the temperature reached 50 Celsius degree, system alarm will be on. Alarm email should be sent out when temperature reached threshold 50. SRX itself seems not able to send alarm email out based on this discussion. NSM or other SNMP tools may help in this situation.

PRTG is using to monitor our network devices and it works great with SNMPv3. My previous post has described how to monitor SRX's CPU, Memory, Flow Sessions etc. Alarm status and Temperature is another sensor I am looking for to monitor. There are couple of ways to do it. You can use NSM to send alarm email, firewall itself to send snmp traps to your SNMP server, or Network Monitoring Tools to pull SNMP OID values then send email. In my case, PRTG is preferred way to monitor system status and send alarming email based on the requirement.

Step 1: SNMPv3 on SRX


set snmp v3 usm local-engine user SRXAES authentication-md5 authentication-password Test1234
set snmp v3 usm local-engine user SRXAES privacy-aes128 privacy-password Test12345
set snmp engine-id local 4716
set snmp view view_all oid 1 include
set snmp filter-duplicates
set snmp health-monitor

set snmp location "<location>"
set snmp contact "<contact name>"
set snmp community <community-name> authorization read-only
set snmp community <community-name> clients <snmp-host>
set snmp community <community-name> clients 0.0.0.0/0 restrict


Note: A generic local engine-id must be configured. Otherwise (e.g. when the MAC is used) SNMPv3 will not work in cluster configurations. After configuring the engine-id, committing the configuration might be required because the engine-id is involved in the key generation below.

To make NSM work with SRX, location and contact should not be set. Else, after the configuration imported into NSM, when you push policy from NSM to SRX, snmpv3 anthentication password and privacy password will be changed.

In my working configuration for NSM and SRX 240H / 1400 Cluster, the configuration looks like below:
root@fw-srx-1> show configuration snmp
v3 {
    usm {
        local-engine {
            user SRXAES {
                authentication-md5 {
                    authentication-key "$9$cOJSKMWLxNbs8LUjq.zF9ApuIEM8Xx-VvM4aJGq.Tz390BhSrlM836evW8dVP5TCuO1EhrOB-VYgJZ69CApBlKM-bsKv4aZUHkBIRcevdbsY4aSr8boa/CAtu1SyKW87vMX-bs4oJGDk5Q9ApREyk.hSreXxk5Qn/9pOBE3nA0O1hcYg4oDi"; ## SECRET-DATA
                }
                privacy-aes128 {
                    privacy-key "$9$4yaZjq.53/CmPF/CtIRNdVsoJDik.mTZGp01IcSM8XNds4oGDHqvWUjqmTQevM8dbYgojk.4oz369OBX7N-s2JZjPfz.muOBIrlLxNdVYgoDkY2QF6/tpM8Lx7VY2aGjHaJUH.PQzEcSl8XVwYaGDsYoGiH5T369pIErev7dbuONdbYoan/9AtO"; ## SECRET-DATA
                }
            }
        }
    }
    vacm {
        security-to-group {
            security-model usm {
                security-name SRXAES {
                    group readonly;
                }
            }
        }
        access {
            group readonly {
                default-context-prefix {
                    security-model usm {
                        security-level privacy {
                            read-view view_all;
                        }
                    }
                }
            }
        }
    }
}
engine-id {
    local 109849;
}
view view_all {
    oid 1 include;
}
client-list snmpclient {
    10.1.1.11/31;
    0.0.0.0/0 {
        restrict;
    }
}


Step 2: PRTG Configuration


PRTG can be easily integrated into your network monitoring system and execute comprehensive monitoring tasks. Also , alerting feature is quite flexible to meet your organization needs. Even one normal windows server can monitoring thousands of sensors without problem.

For SNMPv3 configuration in the PRTG, right click edit pop up menu at  root properties of Device tab, enter the snmpv3 information:

Then you can add your network devices with inherited configuration. All new device will get same snmpv3 configuration.

Step 3: Add SNMP Custom Sensor

Following instruction on the screen to add sensor for your network devices, you will need to pick SNMP category's SNMP Custom type sensor.

In the basic sensor settings, the most important thing is OID values. You will need to know exact OID number to make your own monitoring sensor in the PRTG.

Lets go back to our SRX firewall to find out what the temperature SNMP mib oid is:

Show snmp mib walk 1.3.6.1.4.1 | match temp

we are able to find out a couple of values for temperature:
jnxOperatingTemp.9.1.0.0 = 50
jnxOperatingTemp.9.2.0.0 = 49
jnxFruTemp.9.1.0.0 = 50
jnxFruTemp.9.1.1.0 = 50
jnxFruTemp.9.2.0.0 = 48
jnxFruTemp.9.2.1.0 = 48
From Show Chassis Routing-Engine, there are different type of temperature for cpu and chassis , also for different node if it is cluster configuration.
root@fw-srx-1> show chassis routing-engine
node0:
--------------------------------------------------------------------------
Routing Engine status:
    Temperature                 50 degrees C / 122 degrees F
    CPU temperature             49 degrees C / 120 degrees F

    Total memory              1024 MB Max   850 MB used ( 83 percent)
      Control plane memory     560 MB Max   493 MB used ( 88 percent)
      Data plane memory        464 MB Max   362 MB used ( 78 percent)
    CPU utilization:
      User                       7 percent
      Background                 0 percent
      Kernel                     5 percent
      Interrupt                  0 percent
      Idle                      87 percent
    Model                          RE-SRX240H
    Serial ID                      AAEP4868
    Start time                     2015-01-18 13:24:42 UTC
    Uptime                         38 days, 8 hours, 29 minutes, 47 seconds
    Last reboot reason             0x200:normal shutdown
    Load averages:                 1 minute   5 minute  15 minute
                                       0.16       0.44       0.46
node1:
--------------------------------------------------------------------------
Routing Engine status:
    Temperature                 48 degrees C / 118 degrees F
    CPU temperature             50 degrees C / 122 degrees F

    Total memory              1024 MB Max   696 MB used ( 68 percent)
      Control plane memory     560 MB Max   336 MB used ( 60 percent)
      Data plane memory        464 MB Max   357 MB used ( 77 percent)
    CPU utilization:
      User                       5 percent
      Background                 0 percent
      Kernel                     3 percent
      Interrupt                  0 percent
      Idle                      92 percent
    Model                          RE-SRX240H
    Serial ID                      AAEK3334
    Start time                     2015-02-15 16:05:14 UTC
    Uptime                         10 days, 5 hours, 49 minutes, 24 seconds
    Last reboot reason             0x200:normal shutdown
    Load averages:                 1 minute   5 minute  15 minute
                                       0.06       0.08       0.08
Next step is to find out OID from online website OID database , such as http://oid-info.com/ or Solarwinds SNMP Center:
From the database search result, it shows jnxOperatingTemp = 1.3.6.1.4.1.2636.3.1.13.1.7
In this case, jnxOperatingTemp.9.2.0.0 is 1.3.6.1.4.1.2636.3.1.13.1.7.9.2.0.0. That is exactly OID we need for this monitoring. 

Step 4. Create email alarm

After checked the thresholds for temperature as shown in below, we will build an alarm email.
root@fw-srx-1> show chassis temperature-thresholds
node0:
--------------------------------------------------------------------------
                           Fan speed      Yellow alarm      Red alarm      Fire Shutdown
                          (degrees C)      (degrees C)     (degrees C)      (degrees C)
Item                     Normal  High   Normal  Bad fan   Normal  Bad fan     Normal
Chassis default              35    45       50       40       75       65      100
Routing Engine               35    45       50       40       75       65      100
node1:
--------------------------------------------------------------------------
                           Fan speed      Yellow alarm      Red alarm      Fire Shutdown
                          (degrees C)      (degrees C)     (degrees C)      (degrees C)
Item                     Normal  High   Normal  Bad fan   Normal  Bad fan     Normal
Chassis default              35    45       50       40       75       65      100
Routing Engine               35    45       50       40       75       65      100
Based on this Object Triggers set up, once the JnxOperatingTemp sensor's value is above 51 for 60 seconds, an email will be sent out to admin.

Reference:


Monday, February 23, 2015

A Quick Test to Check Point Capsule Cloud Service

Not sure how many Checkpoint customers are using this service, but it is quite attractive when I heard about it. It will help your remote users connect with your global offices and Internet seamlessly.  

Roaming users will use a vpn tunnel to connect to Check Point's cloud network, from there they could access their company's Internal network with another pre-built vpn tunnel. Also from Check Point Cloud, roaming users will be able to browse Internet safely with Check Point's cloud service:
  • URL Filtering
  • Anti-Virus
  • Anti-Bot
  • Threat Emulation
  • IPS
  • HTTPS Inspection

Lets start to experience it:

Step 1: Register an account at https://cloud.checkpoint.com/ with your email account

 After registration, you will receive a email with subject "Your Capsule Connect registration code". Inside the email, there are all links to download the client for Windows, Macintosh, Android and iOS versions.

Step 2: Download and Install the Client:

From "Your Capsule Connect registration code" email, download windows client on your pc. Double click and follow on screen instruction to complete software installation. You will find a cloud icon appears on your right bottom screen. Basically the client will install a new Local Area Connection network driver "Check Point Virtual Network Adapter For Cloud Connect" in your system.
Right click the cloud icon:
Select 'Show Client' menu to enable main window. Choose connect button to make a connection to Check Point's Cloud network.
After system connected to the cloud, you will find your system got a new ip address (172.16.9.28/22) from DHCP server 172.16.9.27 with DNS server 8.8.8.8.

Also from Speedtest.net, we will see the system got an US ip address 208.43.242.98. The download and upload speed is not that bad. 

My pc is having almost 100Mbps download / upload speed without connecting to Checkpoint Cloud.

Step 3: Log into https://cloud.checkpoint.com/ to review the configuration and policies

Check Point Capsule Cloud Policy Tab.
Under Security Policy, there are three features enabled:

  • URL Filtering
  • Threat Prevention
  • HTTPS Inspection


Step 4: Troubleshooting for https website issue

By default, there is a problem to browse https website, such as Gmail site.It shows a This Connection is Untrusted and the connection is blocked. 
From the "Logs & Reports" tab, it shows Check Point Cloud Service Application Cloud blade blocked those 
Double click the log entry you will get the log details for that record.

After turned off HTTPS Inspection from Policy tab, those https website become available again. 

Reference:


Wednesday, February 18, 2015

Error :%CERM-4-TX_BW_LIMIT: Maximum Tx Bandwidth limit of 85000 Kbps reached for Crypto functionality with securityk9 technology package license

This error message is coming in the one of our router's log constantly.

081062: Feb 18 09:24:08.621 EST: %CERM-4-TX_BW_LIMIT: Maximum Tx Bandwidth limit of 85000 Kbps reached for Crypto functionality with securityk9 technology package license.


It is caused by our Security k9 license limitation. Basically if you do not have a HSEC-k9 license installed on your ISR G2 router, you will see this  error message on the console if the traffic exceeds 85-Mbps unidirectional or 170-Mbps bidirectional.

By upgrading to hseck9 license should be able to remove this error messages. Cisco document Cisco ISR G2 SEC and HSEC Licensing explains well what the difference is between them.

"The HSEC-K9 license removes the curtailment enforced by the U.S. government export restrictions on the encrypted tunnel count and encrypted throughput. HSEC-K9 is available only on the Cisco 2921, Cisco 2951, Cisco 3925, Cisco 3945, Cisco 3925E, and Cisco 3945E. With the HSEC-K9 license, the ISR G2 router can go over the curtailment limit of 225 tunnels maximum for IP Security (IPsec) and encrypted throughput of 85 -Mbps unidirectional traffic in or out of the ISR G2 router, with a bidirectional total of 170 Mbps. "

From our Monitoring software PRTG living traffic, it shows between 8:45AM and 9:00AM, there are obviously traffic spike which reached almost 40mbps. The data was collected and averaged by per minute from PRTG software. It seems the traffic might reach 85mbps at a couple of seconds and triggered this error message on the router logs.

To avoid traffic be throttled by this license limitation, following steps will be able to help you:

1. Get PAK number from your vendor who handles purchasing for you.

a. Quotation:

It will cost your company about $674 to remove this limitation on your router

b. Get Product Authorization Key (PAK):

After you order the license, your vendor will e-delivery to your email with this kind of pdf file:

2. Register License at Cisco license Website

http://tools.cisco.com/SWIFT/LicensingUI/Quickstart


3. Install the license:

Router#copy ftp://test:test@10.94.1.1 flash:
Address or name of remote host [10.94.1.1]?
Source filename [2.lic]? 2.lic
Destination filename [2.lic]? 2.lic
Accessing ftp://*****:*****@10.94.1.1/2.lic...
Loading 2.lic !
[OK - 1153/4096 bytes]
1153 bytes copied in 0.440 secs (2620 bytes/sec)

Router#license install flash:2.lic
Installing licenses from "flash:2.lic"
Installing...Feature:hseck9...Successful:Supported
1/1 licenses were successfully installed
0/1 licenses were existing licenses
0/1 licenses were failed to install

4. Verify

There is no way to find out hseck9 license has been applied from show version and show license since security k9 license already applied.


But you should be able to get following message from the log:

081111: Feb 18 10:42:19.017 EST: %LICENSE-6-INSTALL: Feature hseck9 1.0 was installed in this device. UDI=C3900-SPE100/K9:FOC17027ZDD; StoreIndex=2:Primary License Storage

Reference:

1. Cisco ISR G2 SEC and HSEC Licensing