Pages

Monday, December 5, 2016

Remote Access Raspberry Pi from Anywhere and Dynamic DNS Update with Dynu.com

After installed Raspberry Pi in your environment with Internet connection with my previous post, next step for Pi lover is how to configure your Pi so you can control it from anywhere you go. 
From the research by Google, I found there are two websites providing free service to remote access your Pi from anywhere through Internet.


1. Weaved Remot3.it

Note: Weaved has evolved to become remot3.it. Once Remot3.it process verfifed, I will update this part again. 


1.1 Upgrade a Pi to remot3.it over a Weaved SSH connection

Use these instructions ONLY if you are connecting to the Pi over a Weaved ssh connection. 

Add your Pi and all your Weaved services to remot3.it today


1.2 Upgrade your Pi to remot3.it from Weaved
Use these instructions ONLY when you have physical access to the Pi via a LAN connection (Wi-Fi or ethernet). Or use a USB (or bluetooth) keyboard+mouse and HDMI monitor.

Step 1 of 4
Open up a command line on your Pi using either a keyboard+HDMI monitor or an ssh connection over a Wi-Fi or ethernet LAN.
Step 2 of 4
Update the package list on your Pi so you will get the latest version of the weavedconnectd package
>  sudo apt-get update
Step 3 of 4
Download and install the weavedconnectd deb package that includes support for remot3.it by entering the following command.
>  sudo apt-get install weavedconnectd
Step 4 of 4
Run weavedinstaller from the command line.
sudo weavedinstaller
Use the on-screen Sign In Menu (shown below) to Sign In to your remot3.it account by entering "1" at the prompt. Use your pre-existing Weaved account email and password to Sign In to www.remot3.it88.

Next, when prompted to enter a device name, give your Pi a device name (ex. my_Pi_001 ) as shown below. The device name entered will be displayed in the remot3.it portal. You can edit the device name later at any time. Type in a name and press Enter, then let the installer finish and return to the prompt. Then Exit the interactive menu installer by entering "4". (menu item 4).


login as: pi
pi@51sec.dynu.com's password:
Linux raspberrypi 4.1.7-v7+ #817 SMP PREEMPT Sat Sep 19 15:32:00 BST 2015 armv7l

The programs included with the Debian GNU/Linux system are free software;
the exact distribution terms for each program are described in the
individual files in /usr/share/doc/*/copyright.

Debian GNU/Linux comes with ABSOLUTELY NO WARRANTY, to the extent
permitted by applicable law.
Last login: Mon Dec 5 10:49:33 2016 from 199.246.116.129
pi@raspberrypi ~ $
pi@raspberrypi ~ $
sudo apt-get update
Get:1 http://archive.raspberrypi.org wheezy Release.gpg [473 B]
Hit http://raspberrypi.collabora.com wheezy Release.gpg
Get:2 http://mirrordirector.raspbian.org wheezy Release.gpg [473 B]
Hit http://raspberrypi.collabora.com wheezy Release
Get:3 http://mirrordirector.raspbian.org wheezy Release [14.4 kB]
Get:4 http://archive.raspberrypi.org wheezy Release [17.6 kB]
Hit http://raspberrypi.collabora.com wheezy/rpi armhf Packages
Get:5 http://mirrordirector.raspbian.org wheezy/main armhf Packages [6,935 kB]
Get:6 http://archive.raspberrypi.org wheezy/main armhf Packages [145 kB]
Ign http://raspberrypi.collabora.com wheezy/rpi Translation-en_GB
Ign http://raspberrypi.collabora.com wheezy/rpi Translation-en
Ign http://archive.raspberrypi.org wheezy/main Translation-en_GB
Ign http://archive.raspberrypi.org wheezy/main Translation-en
Get:7 http://mirrordirector.raspbian.org wheezy/contrib armhf Packages [23.6 kB]
Get:8 http://mirrordirector.raspbian.org wheezy/non-free armhf Packages [49.3 kB ]
Get:9 http://mirrordirector.raspbian.org wheezy/rpi armhf Packages [592 B]
Ign http://mirrordirector.raspbian.org wheezy/contrib Translation-en_GB
Ign http://mirrordirector.raspbian.org wheezy/contrib Translation-en
Ign http://mirrordirector.raspbian.org wheezy/main Translation-en_GB
Ign http://mirrordirector.raspbian.org wheezy/main Translation-en
Ign http://mirrordirector.raspbian.org wheezy/non-free Translation-en_GB
Ign http://mirrordirector.raspbian.org wheezy/non-free Translation-en
Ign http://mirrordirector.raspbian.org wheezy/rpi Translation-en_GB
Ign http://mirrordirector.raspbian.org wheezy/rpi Translation-en
Fetched 7,186 kB in 22s (320 kB/s)
Reading package lists... Done
pi@raspberrypi ~ $
sudo apt-get install weavedconnectd
Reading package lists... Done
Building dependency tree
Reading state information... Done
weavedconnectd is already the newest version.
0 upgraded, 0 newly installed, 0 to remove and 144 not upgraded.
pi@raspberrypi ~ $
sudo weavedinstaller
Weaved connection installer Version: v1.3-02_Pi

Checking your network for compatibility...

Your network is compatible with Weaved services.
Please enter your Weaved Username (email address):
johnyan.ca@gmail.com

Please enter your password:
You have entered either an incorrect username or password. Please try again.
Press the 'Enter' key to continue.
Please enter your Weaved Username (email address):
johnyan.ca@gmail.com

Please enter your password:
=========================================================
Protocol Port Service Weaved Name
=========================================================
TCP 3389 xrdp xrdp-pi
SSH 22 sshd jrasp-ssh


********************** Main Menu ************************
* *
* 1) Attach/reinstall Weaved to a Service *
* 2) Remove Weaved attachment from a Service *
* 3) Exit *
* *
*********************************************************

Please select from the above options (1-3):
3
pi@raspberrypi ~ $


Weaved provides your Raspberry any TCP based service you want to make available remotely – securely and without port forwarding
• SSH on port 22
• Web (http) on port 80
• WebIOPI on port 8000 (Raspberry Pi only)
• VNC on port 5901
• Custom TCP service on any port you like

Multiple services can be installed on same box, also there is free iOS app which can set up your Pi to send you push notifications.


The homepage says it adds the power of remote connections & mobile to your Raspberry Pi in as little as 15 minutes. 

1.1 Manually Installation


pi@raspberrypi ~ $ wget https://github.com/weaved/installer/raw/master/binaries/weaved-nixinstaller_1.2.13.bin
--2015-10-06 12:45:16--  https://github.com/weaved/installer/raw/master/binaries/weaved-nixinstaller_1.2.13.bin
Resolving github.com (github.com)... 192.30.252.129
Connecting to github.com (github.com)|192.30.252.129|:443... connected.
HTTP request sent, awaiting response... 302 Found
Location: https://raw.githubusercontent.com/weaved/installer/master/binaries/weaved-nixinstaller_1.2.13.bin [following]
--2015-10-06 12:45:19--  https://raw.githubusercontent.com/weaved/installer/master/binaries/weaved-nixinstaller_1.2.13.bin
Resolving raw.githubusercontent.com (raw.githubusercontent.com)... 199.27.76.133
Connecting to raw.githubusercontent.com (raw.githubusercontent.com)|199.27.76.133|:443... connected.
HTTP request sent, awaiting response... 200 OK
Length: 303036 (296K) [application/octet-stream]
Saving to: `weaved-nixinstaller_1.2.13.bin'

100%[=============================>] 303,036      665K/s   in 0.4s  


2015-10-06 12:45:23 (665 KB/s) - `weaved-nixinstaller_1.2.13.bin' saved [303036/303036]


pi@raspberrypi ~ $ chmod +x weaved-nixinstaller_1.2.13.bin

pi@raspberrypi ~ $ ./weaved-nixinstaller_1.2.13.bin
Extracting Weaved Software into /home/pi
Finished extracting

You are running installer script Version: v1.2.13

Last modified on February 26, 2015, by Mike Young.

Now launching the Weaved connectd daemon installer...

.
We have detected an arm7l processor.
Is this a Raspberry Pi 2? [y/n] y
Detected platform type: pi
Using /var/log/syslog for your log file

Checking for compatibility with Weaved's network...


Checking if DNS works ... .[OK]


Checking TCP connectivity to weaved.com...<oip=192.168.2.250> [OK]


Send to 174.36.235.146:5960 [] [mip=216.165.201.211] [oport=59612 mport=59612] [no remap] [preserve port] [OK]


Congratulations! Your network is compatible with Weaved services.


*********** Protocol Selection Menu ***********

*                                             *
*    1) SSH on default port 22                *
*    2) Web (HTTP) on default port 80         *
*    3) WebIOPi on default port 8000          *
*    4) VNC on default port 5901              *
*    5) Custom (TCP)                          *
*                                             *
***********************************************

Please select from the above options (1-5):

1
You have selected: 1.

The default port for SSH is 22.

Would you like to continue with the default port assignment? [y/n] y
We will install Weaved services for the following:

Protocol: ssh

Port #: 22
Service name: Weavedssh22


Please enter your Weaved Username (email address):

test123456@gmail.com

Now, please enter your password:

Copied notify.sh to /usr/bin
Copied notify_Weavedssh22.sh to /usr/bin
Copied weavedConnectd to /usr/bin
startweaved.sh copied to /usr/bin
no crontab for root
no crontab for root


Your device UID has been successfully provisioned as: 80:00:00:05:46:00:52:0F.


Pre-registration of UID: 80:00:00:05:46:00:52:0F successful.


We will now register your device with the Weaved backend services.

Please provide an alias for your device:
jrasp
Your device will be called jrasp.

Registering Weaved services for Weavedssh22 ................


Starting Weavedssh22...

WeavedConnectd built Feb 26 2015 at 10:53:39 Now Starting Up
   Version 2.11 - (c)2015 Weaved, Inc. All Rights Reserved
   Built with UPNP NATPMP ALIGN BCASTER MALLOC_POOL LINUX RESOLVE BIGBUF pool=262144
   Weaved Development Kit Version based on    Rasberry Pi Version
config file /etc/weaved/services/Weavedssh22.conf
Starting up as daemon
PID file specifed as /var/run/Weavedssh22.pid
setting web config port to dest_server_port 80


**************************************************************************

CONGRATULATIONS! You are now registered with Weaved.
Your registration information is as follows:

Device alias:

jrasp

Device UID:

80:00:00:05:46:00:52:0F

Device secret:


The alias, Device UID and Device secret are kept in the License File:

/etc/weaved/services/Weavedssh22.conf

If you delete this License File, you will have to re-run the installer.


**************************************************************************


Starting and stopping your service can be done by typing:

"sudo /usr/bin/Weavedssh22.sh start|stop|restart"
pi@raspberrypi ~ $


By click your device name, Weaved website will give you a new host name and ports for you to do remote connection from anywhere on Internet.


1.2 use apt-get to do auto installation

sudo apt-get update
sudo apt-get install weavedconnectd
sudo weavedinstaller
.
//after entered required information, it will list all registed services
// You will be prompted a menu to choose what you intend to do
=========================================================
Protocol        Port    Service         Weaved Name
=========================================================
TCP             3389    xrdp            xrdp-pi
SSH             22      sshd            jrasp-ssh


********************** Main Menu ************************

*                                                       *
*       1) Attach/reinstall Weaved to a Service         *
*       2) Remove Weaved attachment from a Service      *
*       3) Exit                                         *
*                                                       *
*********************************************************

Please select from the above options (1-3):


2. Dataplicity

If your Raspberry Pi is connected to the internet, you can access it via Dataplicity from anywhere through Internet. You can even connect to devices behind firewalls without needing complex network configurations. Dataplicity connects using client-initiated HTTPS, so it's safe, encrypted and you don't need to make specific firewall exceptions. Dataplicity's homepage says only 60 seconds you can have your Pi to be ready for controlling from anywhere. Of course, it will take longer than 60 seconds but you will not wait more than 5 minutes. Here are all outputs with my test:


login as: pi
pi@proxy5.weaved.com's password:
Linux raspberrypi 3.18.7-v7+ #755 SMP PREEMPT Thu Feb 12 17:20:48 GMT 2015 armv7                                                                                                                       l

The programs included with the Debian GNU/Linux system are free software;

the exact distribution terms for each program are described in the
individual files in /usr/share/doc/*/copyright.

Debian GNU/Linux comes with ABSOLUTELY NO WARRANTY, to the extent

permitted by applicable law.
Last login: Sat Oct 10 10:18:58 2015 from 192.168.2.120
pi@raspberrypi ~ $ curl -s https://dataplicity.com/1c7196e9.sh | sudo sh
Welcome to the Dataplicity Shell Quick Install
This may take up to 15 minutes on some systems, but often < 30 seconds

 [step 1 of 5] updating system...

Selecting previously unselected package python-medusa.
(Reading database ... 77461 files and directories currently installed.)
Unpacking python-medusa (from .../python-medusa_1%3a0.5.4-7_all.deb) ...
Selecting previously unselected package python-pkg-resources.
Unpacking python-pkg-resources (from .../python-pkg-resources_0.6.24-1_all.deb)                                                                                                                        ...
Selecting previously unselected package python-meld3.
Unpacking python-meld3 (from .../python-meld3_0.6.5-3.1_armhf.deb) ...
Selecting previously unselected package supervisor.
Unpacking supervisor (from .../supervisor_3.0a8-1.1+deb7u1_all.deb) ...
Setting up python-medusa (1:0.5.4-7) ...
Setting up python-pkg-resources (0.6.24-1) ...
Setting up python-meld3 (0.6.5-3.1) ...
Setting up supervisor (3.0a8-1.1+deb7u1) ...
Starting supervisor: supervisord.
Processing triggers for python-support ...
Selecting previously unselected package libossp-uuid16.
(Reading database ... 77687 files and directories currently installed.)
Unpacking libossp-uuid16 (from .../libossp-uuid16_1.6.2-1.3_armhf.deb) ...
Selecting previously unselected package uuid.
Unpacking uuid (from .../uuid_1.6.2-1.3_armhf.deb) ...
Processing triggers for man-db ...
Setting up libossp-uuid16 (1.6.2-1.3) ...
Setting up uuid (1.6.2-1.3) ...
Preconfiguring packages ...
(Reading database ... 77701 files and directories currently installed.)
Preparing to replace libssl1.0.0:armhf 1.0.1e-2+rvt+deb7u14 (using .../libssl1.0                                                                                                                       .0_1.0.1e-2+rvt+deb7u17_armhf.deb) ...
Unpacking replacement libssl1.0.0:armhf ...
Preparing to replace libexpat1:armhf 2.1.0-1+deb7u1 (using .../libexpat1_2.1.0-1                                                                                                                       +deb7u2_armhf.deb) ...
Unpacking replacement libexpat1:armhf ...
Selecting previously unselected package libexpat1-dev.
Unpacking libexpat1-dev (from .../libexpat1-dev_2.1.0-1+deb7u2_armhf.deb) ...
Selecting previously unselected package libssl-dev.
Unpacking libssl-dev (from .../libssl-dev_1.0.1e-2+rvt+deb7u17_armhf.deb) ...
Selecting previously unselected package libssl-doc.
Unpacking libssl-doc (from .../libssl-doc_1.0.1e-2+rvt+deb7u17_all.deb) ...
Selecting previously unselected package python2.7-dev.
Unpacking python2.7-dev (from .../python2.7-dev_2.7.3-6+deb7u2_armhf.deb) ...
Selecting previously unselected package python-dev.
Unpacking python-dev (from .../python-dev_2.7.3-4+deb7u1_all.deb) ...
Processing triggers for man-db ...
Setting up libssl1.0.0:armhf (1.0.1e-2+rvt+deb7u17) ...
Setting up libexpat1:armhf (2.1.0-1+deb7u2) ...
Setting up libexpat1-dev (2.1.0-1+deb7u2) ...
Setting up libssl-dev (1.0.1e-2+rvt+deb7u17) ...
Setting up libssl-doc (1.0.1e-2+rvt+deb7u17) ...
Setting up python2.7-dev (2.7.3-6+deb7u2) ...
Setting up python-dev (2.7.3-4+deb7u1) ...
 [step 2 of 5] installing Dataplicity Core...
id: dataplicity: No such user
/tmp/tmpYpFshT/pip.zip/pip/_vendor/requests/packages/urllib3/util/ssl_.py:90: InsecurePlatformWarning: A true SSLContext object is not available. This prevents urllib3 from configuring SSL appropriatly and may cause certain SSL connections to fail. For more information, see https://urllib3.readthedocs.org/en/latest/security.html#insecureplatformwarning.
Reading package lists... Done
Building dependency tree
Reading state information... Done
The following NEW packages will be installed:
  python-psutil
0 upgraded, 1 newly installed, 0 to remove and 93 not upgraded.
Need to get 54.4 kB of archives.
After this operation, 264 kB of additional disk space will be used.
Get:1 http://mirrordirector.raspbian.org/raspbian/ wheezy/main python-psutil armhf 0.5.1-1 [54.4 kB]
Fetched 54.4 kB in 10s (5,203 B/s)
Selecting previously unselected package python-psutil.
(Reading database ... 79253 files and directories currently installed.)
Unpacking python-psutil (from .../python-psutil_0.5.1-1_armhf.deb) ...
Setting up python-psutil (0.5.1-1) ...
Processing triggers for python-support ...
 [step 3 of 5] installing Dataplicity...
 [step 4 of 5] registering device 'raspberrypi'...
 [step 5 of 5] starting service...

Dataplicity Shell is now installed!

Your device will be online in a few seconds
Visit https://dataplicity.com/devices/ to manage your device

pi@raspberrypi ~ $ Restarting supervisor: supervisord.


After installed the Dataplicity package, you can log in to Dataplicity, select the device you want and access your remote shell. It's that simple! 

Your devices page at Dataplicity Site before installed package


Your Raspberry device shows in the Your devices page


Just click your device name, your browser will show you your Raspberry session. 


3. Raspberry Pi Dynamic IP DNS Update

3.1 install DDclient on Raspberry Pi


sudo apt-get install ddclient

3.2 Configure /etc/ddclient.conf file 
I am using Dynu free dynamic domain update service. Based on what I found the the suggested configuration file from Dynu website, I generated one for myself.


login as: pi
pi@51sec.dynu.com's password:
Linux raspberrypi 4.1.7-v7+ #817 SMP PREEMPT Sat Sep 19 15:32:00 BST 2015 armv7l

The programs included with the Debian GNU/Linux system are free software;
the exact distribution terms for each program are described in the
individual files in /usr/share/doc/*/copyright.

Debian GNU/Linux comes with ABSOLUTELY NO WARRANTY, to the extent
permitted by applicable law.
Last login: Sun Dec 4 22:43:54 2016 from 192.168.2.13
pi@raspberrypi ~ $
cd /etc
pi@raspberrypi /etc $
sudo cat ddclient.conf

daemon = 60
syslog=yes # Lheck every 60 seconds.
mail=root # Mail all msgs to root.
mail-failure=root # Mail failed update msgs to root.
pid=/var/run/ddclient.pid # Record PID in file.
use=web, web=checkip.dynu.com/, web-skip='IP Address' #Get ip from server.
server=api.dynu.com # IP update server.
protocol=dyndns2
login=jonnet # Your username.
password=12345678 # Password or MD5 of password.
51sec.DYNU.COM # List one or more hostnames one on each line.
91sec.dynu.com
#MYDOMAIN.COM

pi@raspberrypi /etc $


3.3 Run ddclient as a daemon
Since we don't just want the IP address to update once, we still need to set up ddclient to run as a daemon so it can check for a change of IP address periodically and notify the dynamic DNS provider if necessary.
To start the daemon we need to open another configuration file, /etc/default/ddclient and set:
run_daemon="true"
You will notice there is a daemon_interval parameter there too, I think the default value of 300 seconds (5 minutes) is reasonable, so I didn't change it.
Save and close the file, and then run:
sudo service ddclient start
to start the daemon, and:
sudo service ddclient status
to check its status.
ddclient keeps a cache of your IP address, and it will only update the record with your dynamic DNS provider if your IP address hasn't changed. Since some ISPs seem to only allocate new IP addresses when the modem is power cycled, and some dynamic DNS providers will time out if you don't update the record in a while, there is one thing left to do - we need to add a cron job to force an update weekly, just in case.
Choose whether you want to force an update daily or weekly, and then create a file called ddclient in the relevant directory, e.g. /etc/cron.daily or /etc/cron.weekly:
sudo nano /etc/cron.daily/ddclient
Fill in this information:
#!/bin/sh
/usr/sbin/ddclient -force
Then make the script executable:
sudo chmod +x /etc/cron.daily/ddclient
Done :)

Note: For how to get your public ip address from Linux Command line
using curl or wget  extract the information from public site:
curl -s checkip.dyndns.org | sed -e 's/.*Current IP Address: //' -e 's/<.*$//'  
or 


wget http://ipinfo.io/ip -qO -


Reference:


Sunday, December 4, 2016

Check Point Appliance Visio Stencils for Downloading

Check Point  released their new products stencils public for downloading. You will not need Check Point account to download. It does not include some old models. Following appliance includes in this 3M file:

  • 2200
  • 3200
  • 4000
  • 5000
  • 12000
  • 13000
  • 15000
  • 21000
  • 23000
  • 41000-61000
  • Accessories
  • SandBlast
  • Smart-1
  • SMB-ROBO


Check Point SK Link sk101866.
Here is Download Link from Check Point Website: http://dl3.checkpoint.com/paid/90/902caf44a13d71e91a35315e4a28caa8/CheckPoint_Stencils_for_Visio.zip?HashKey=1480871979_bb9dd6cf9a98c6bf41f3cd1fd147c855&xtn=.zip


Monday, November 28, 2016

Procedures to Deploy RMA device into Juniper SRX Chassis Cluster

Juniper KB mentioned some RMA steps for failed Juniper device replacement. There are some steps not clear enough. I put some more configuration steps in this post for future reference:

There are many preparation works before you can add RMA device into your chassis group.


Step 1, Upgrade JunOS Remotely
Usually your RMA Device is delivered to the production environment to do replacement. You will have to remotely upgrade JunOS first.

login: root
root>
--- JUNOS 10.0R1.8 built 2009-11-03 10:06:39 UTC
root>

root> show version
Model: srx240-hm
JUNOS Software Release [10.0R1.8]
root> configure 
Entering configuration mode
[edit]
root# delete 
This will delete the entire configuration
Delete everything under this level? [yes,no] (no) yes
[edit]
root# set system root-authentication plain-text-password
New password:
Retype new password:

[edit]
root# commit and-quit
commit complete
Exiting configuration mode
root> set chassis cluster cluster-id 4 node 0 reboot 
Successfully enabled chassis cluster. Going to reboot now


Some basic configurationon fxp0.0 interface and default static route. Also ssh service will need to be enabled.
root> show configuration 
## Last commit: 2016-11-29 03:37:32 UTC by root
version 10.0R1.8;
system {
root-authentication {
encrypted-password "$1$2eav5HPL$01SUB9SOzDJl007hXhNVj0"; ## SECRET-DATA
}
services {
ssh;
}
}
interfaces {
fxp0 {
unit 0 {
family inet {
address 10.9.1.11/24;
}
}
}
}
routing-options {
static {
route 0.0.0.0/0 next-hop 10.9.1.1;
}
}
{primary:node0}
root> request system software add /var/tmp/junos-srxsme-12.1X46-D55.3-domestic.tgz reboot
NOTICE: Validating configuration against junos-srxsme-12.1X46-D55.3-domestic.tgz.
NOTICE: Use the 'no-validate' option to skip this if desired.
Formatting alternate root (/dev/da0s2a)...
/dev/da0s2a: 298.0MB (610284 sectors) block size 16384, fragment size 2048
using 4 cylinder groups of 74.50MB, 4768 blks, 9600 inodes.
super-block backups (for fsck -b #) at:
32, 152608, 305184, 457760
** /dev/altroot
FILE SYSTEM CLEAN; SKIPPING CHECKS
clean, 150096 free (24 frags, 18759 blocks, 0.0% fragmentation)
Checking compatibility with configuration
Initializing...
Verified manifest signed by PackageProduction_10_0_0
Verified junos-10.0R1.8-domestic signed by PackageProduction_10_0_0
Using junos-12.1X46-D55.3-domestic from /altroot/cf/packages/install-tmp/junos-12.1X46-D55.3-domestic
Copying package ...
veriexec: cannot validate /cf/var/validate/chroot/junos/pkg/manifest.certs: unhandled critical extension: /C=US/ST=CA/L=Sunnyvale/O=Juniper Networks/OU=Juniper CA/CN=PackageProductionRSA_2016/emailAddress=ca@juniper.net
chroot: /usr/bin/hwdb_xml_parser: Authentication error
Unable to regenerate Hardware Database, skipping hardware database checks at install time
chroot: tar: Authentication error
Validating against /config/juniper.conf.gz
cp: /cf/var/validate/chroot/var/etc/resolv.conf and /etc/resolv.conf are identical (not copied).
cp: /cf/var/validate/chroot/var/etc/hosts and /etc/hosts are identical (not copied).
chroot: /usr/sbin/mgd: Authentication error
Validation failed
WARNING: Current configuration not compatible with /altroot/cf/packages/install-tmp/junos-12.1X46-D55.3-domestic

{primary:node0}
root> request system software add /var/tmp/junos-srxsme-12.1X46-D55.3-domestic.tgz reboot no-validate
Formatting alternate root (/dev/da0s2a)...
/dev/da0s2a: 298.0MB (610284 sectors) block size 16384, fragment size 2048
using 4 cylinder groups of 74.50MB, 4768 blks, 9600 inodes.
super-block backups (for fsck -b #) at:
32, 152608, 305184, 457760
** /dev/altroot
FILE SYSTEM CLEAN; SKIPPING CHECKS
clean, 150096 free (24 frags, 18759 blocks, 0.0% fragmentation)
Installing package '/altroot/cf/packages/install-tmp/junos-12.1X46-D55.3-domestic' ...
verify-sig: cannot validate ./certs.pem
unhandled critical extension: /C=US/ST=CA/L=Sunnyvale/O=Juniper Networks/OU=Juniper CA/CN=PackageProductionRSA_2016/emailAddress=ca@juniper.net

Installation failed for package '/altroot/cf/packages/install-tmp/junos-12.1X46-D55.3-domestic'

One of the reasons why installation failed is because the device is set to a date earlier than the date on which the jloader was built, therefore the certificate for the file is not yet valid.


root> set date 201611281600.00    
node0:
--------------------------------------------------------------------------
Mon Nov 28 16:00:00 UTC 2016


Another reason is you will have to upgrade to intermediate version first before you can upgrade to some latest release. For example, from JunOS 10 to 12.1x44 first, then you can do upgrade to 12.1x46


Step 2: Follwoing Juniper KB's instruction:

Note: It does not include IDP signature database step when there is IDP feature enabled on your system. You will have to deactivate security idp first before go to step 6.


  [KB21134] Show KB Properties
Perform the following procedure:
  1. Check the following parameters, prior to  deploying a RMA device in a Chassis Cluster environment:

    Make sure that the following parameters on the new RMA device are the same as the active node of the Chassis Cluster.

    • Check the hardware on the active cluster node and ensure that the device, which is being placed in the cluster, has the same hardware setup and all FPCs are present in the same slot and active. The command to check this is show chassis hardware.
    • Check the Junos version on the active node of the cluster and upgrade or downgrade Junos (for more information, refer to KB16652 - SRX Getting Started - Junos Software Installation/Upgrade) on the new device; so that they match. 
    • Save the configuration in a file on the working node and upload the file to the new device in the /var/tmpdirectory.
    • note: we can use FAT formatted USB key to transfer file into new SRX. 
    • Command: mount -t msdos /dev/da0s1 /mnt
  2. Console to the isolated RMA device (make sure that no cables are connected, other than console cable) and perform the following procedure:    

    1. Get into the configuration mode.
    2. Execute the # delete command.
    3. Configure the root password:
      # set system root-authentication plain-text-password
    4. Then commit:
      # commit
  3. Configure Chassis Clustering on the isolated RMA device.  Use the following command to enable the chassis cluster (you can execute the show chassis cluster status command on the working node to identify the cluster-id):
    code>set chassis cluster cluster-id <id> node <No.>
     <No.> will be 1 or 0, depending on which node is being replaced.
  4. Reboot the new node. The node will come online with the cluster being enabled:
    > request system reboot
  5. Enter the configuration mode and load the configuration from the file, which was copied in the /var/tmp directory in step 1. Use the  following command to load the configuration:
    # load override /var/tmp/<filename>
    note: if there is IDP feature enabled, you will have to deactivate it first with command : deactivate security idp
  6. When the configuration is completely loaded, commit the configuration:
    # commit and-quit
  7. Halt the new node:
    > request system halt.
  8. Now connect the fabric and control ports (makes sure that none of the revenue port cables are connected) and reboot the node.
  9. Check the status of the FPC PIC by executing the show chassis fpc pic-status command. In the output, all of the FPCs and PICs should be online.
  10. When the new node comes online, it should join the cluster as the secondary. You can check the status by executing the show chassis cluster status command. In the output, the priority of RG0 should be the configured value and the priority of the other RG should be 0, If interface monitoring has been configured.
  11. In the output that is generated in step 10, if the new node is shown as the primary, then contact Juniper support for assistance.
  12. If the output that is generated in step 10 shows the primary and secondary for all RGs, then connect all the revenue port cables and again check the chassis cluster status via the show chassis cluster status command. In this output, you should see the configured values for all of the RGs.

  13. If you can access the internet from the new node, then update the license on the new node or download the license and load it. If you are downloading the license on the PC, then save it in a file and upload it to the new node in the /var/tmp directory:
    > request system licnese update >  If you can access the the internet from the new node.
    > request system license add /var/tmp/<filename> > if adding the license from a file.   
Step 3: Troubleshooting Issues

3.1 Nodes of a cluster go into Primary/Lost  or Primary / Primary state
Control link and Fabric link send the packets but not receive anything.
Changed Fabric ports on SRX , but situation is still same. Changed cable to try, same result.

Based on KB23929, it is caused with following reason:

"With codes prior to 10.4, by default, the control port tagging was enabled and it used the 4094 VLAN. For 10.4 and later codes, by default, it is disabled.

So, the upgrade/downgrade makes one node of the control port as tagged and the other node as untagged; so this causes control packets to drop, which in turn causes the Split Brain condition."

SOLUTION:
to avoid the split brain condition, set both sides of the control-link either as tagged or untagged, by using the following command via the CLI:

root> set chassis cluster control-link-vlan enable/disable
warning: A reboot is required for control-link-vlan to be disabled

{primary:node1}
test@fw1-2> request system reboot 
Reboot the system ? [yes,no] (no) yes

{primary:node1}
test@fw1-2>
show chassis cluster information detail
node0:
--------------------------------------------------------------------------
Redundancy mode:
Configured mode: active-active
Operational mode: active-active
Cluster configuration:
Heartbeat interval: 1000 ms
Heartbeat threshold: 3
Control link recovery: Enabled
Fabric link down timeout: 66 sec
Node health information:
Local node health: Healthy
Remote node health: Healthy

Redundancy group: 0, Threshold: 255, Monitoring failures: none
Events:
Dec 7 13:57:43.435 : hold->secondary, reason: Hold timer expired
Dec 7 15:48:17.158 : secondary->primary, reason: Control & Fabric links down
Dec 7 15:48:34.749 : primary->secondary-hold, reason: Preempt/yield(10/100)
Dec 7 15:53:34.754 : secondary-hold->secondary, reason: Ready to become secondary
Dec 7 17:53:56.761 : secondary->primary, reason: Control & Fabric links down
Dec 7 17:53:59.428 : primary->secondary-hold, reason: Preempt/yield(10/100)
Dec 7 17:58:59.433 : secondary-hold->secondary, reason: Ready to become secondary

Redundancy group: 1, Threshold: 255, Monitoring failures: none
Events:
Dec 7 13:57:43.512 : hold->secondary, reason: Hold timer expired
Dec 7 15:48:17.134 : secondary->ineligible, reason: Fabric link down
Dec 7 15:48:17.863 : ineligible->primary, reason: Control & Fabric links down
Dec 7 15:48:34.753 : primary->secondary-hold, reason: Monitor failed: IF
Dec 7 15:48:35.762 : secondary-hold->secondary, reason: Ready to become secondary
Dec 7 15:51:00.571 : secondary->ineligible, reason: Fabric link down
Dec 7 17:53:41.929 : ineligible->secondary, reason: fabric link UP
Dec 7 17:53:56.830 : secondary->primary, reason: Control & Fabric links down
Dec 7 17:53:59.431 : primary->secondary-hold, reason: Monitor failed: CS
Dec 7 17:54:00.434 : secondary-hold->secondary, reason: Ready to become secondary
Control link statistics:
Control link 0:
Heartbeat packets sent: 19997
Heartbeat packets received: 19949
Heartbeat packet errors: 0
Duplicate heartbeat packets received: 0
Control recovery packet count: 0
Sequence number of last heartbeat packet sent: 20024
Sequence number of last heartbeat packet received: 20501
Fabric link statistics:
Child link 0
Probes sent: 11579
Probes received: 11575
Child link 1
Probes sent: 0
Probes received: 0
Switch fabric link statistics:
Probe state : DOWN
Probes sent: 0
Probes received: 0
Probe recv errors: 0
Probe send errors: 0
Probe recv dropped: 0
Sequence number of last probe sent: 0
Sequence number of last probe received: 0

Chassis cluster LED information:
Current LED color: Green
Last LED change reason: No failures
Control port tagging:
Disabled
............omitted......

node1:
--------------------------------------------------------------------------
Redundancy mode:
Configured mode: active-active
Operational mode: active-active
Cluster configuration:
Heartbeat interval: 1000 ms
Heartbeat threshold: 3
Control link recovery: Enabled
Fabric link down timeout: 66 sec
Node health information:
Local node health: Healthy
Remote node health: Healthy

Redundancy group: 0, Threshold: 255, Monitoring failures: none
Events:
Dec 7 13:49:59.220 : hold->secondary, reason: Hold timer expired
Dec 7 13:53:47.517 : secondary->primary, reason: Remote node reboot

Redundancy group: 1, Threshold: 255, Monitoring failures: none
Events:
Dec 7 13:49:59.267 : hold->secondary, reason: Hold timer expired
Dec 7 13:51:05.382 : secondary->primary, reason: Remote yield (100/0)
Control link statistics:
Control link 0:
Heartbeat packets sent: 20475
Heartbeat packets received: 20172
Heartbeat packet errors: 0
Duplicate heartbeat packets received: 0
Control recovery packet count: 0
Sequence number of last heartbeat packet sent: 20502
Sequence number of last heartbeat packet received: 20025
Fabric link statistics:
Child link 0
Probes sent: 11740
Probes received: 11585
Child link 1
Probes sent: 0
Probes received: 0
Switch fabric link statistics:
Probe state : DOWN
Probes sent: 0
Probes received: 0
Probe recv errors: 0
Probe send errors: 0
Probe recv dropped: 0
Sequence number of last probe sent: 0
Sequence number of last probe received: 0

Chassis cluster LED information:
Current LED color: Green
Last LED change reason: No failures
Control port tagging:
Disabled
............omitted......


Sunday, November 27, 2016

Wordpress Attitude Theme Menu Bar Customize

Attitude Theme has been used for my Wordpress site http://51sec.org. It is powerful and simple to use.

here are some introduction about this theme from its website:

"Attitude is a Simple, Clean and Responsive Retina Ready WordPress Theme which adapts automatically to your tablets and mobile devices. Theme is easily customizable with numerous theme options via Customize. Some of the highlighted options are two site layout (Narrow and Wide), 5 layouts for every post/page, 5 Page Templates, 5 widget areas, 4 custom widgets, featured slider to highlight your post/page, 11 social icons and many more. Also has custom background, header, menu, favicon, CSS, webclip icon, and logo. Supports popular plugins like Breadcrumb NavXT, WP-PageNavi and Contact Form 7. It is also translation ready. Available Translation: Traditional Chinese (Taiwan), Spanish, Norwegian (Nynorsk), German, Russian, Dutch, Italian and Danish. Get free support on http://themehorse.com/support-forum/"

In original theme, the menu bar was not placed in the right place I would like to. It located between site site logon and header image. I figured out to use some simple CSS codes to manipulate it.


1. Move it to above the header image using absolute position and 105px from the top. 


#access {
position: absolute;
width: 100%;
z-index: 100;
}

.hgroup-wrap {
background-color: #fff;
top: 0;
}
#access {
top: 105px;
}


2. Move it to top and fixed in the window even scroll the page


#access {
position: fixed;
width: 100%;
z-index: 100;
background-color: #ffffff;
}

.hgroup-wrap {
background-color: #fff;
top: 0;
}
#access {
top: 0px;
}


3. Make Menu Bar Smaller, 90% Opacity and without border

#access {
position: fixed;
width: 100%;
z-index: 100;
background-color: #ffffff;
background: rgba(255, 255, 255, 0.9);
border: 0 none;
}

.hgroup-wrap {
background-color: #fff;
top: 0;
}
#access {
top: 0px;
}


#access a {
padding-top: 10px;
height: 30px;
}
.page-title-wrap {
padding: 10px 0;
}


4. Make Submenu Touch Horizon Menu
There was a problem to click the submenu. Each time when mouse moved out horizon menu area, submenu disappeared right away. Finally I found that was because my submenu is too far from horizon menu.
margin-top: -25px brought  submenu ul to touch the menu ul and padding-top: 5px pushed the first Li 5px down.

#access {
position: fixed;
width: 100%;
z-index: 100;
background: #FFFFFF;
background: rgba(255, 255, 255, 0.9);
border: 0 none;
}

.hgroup-wrap {
background-color: #fff;
top: 0;
}
#access {
top: 0px;
}


#access a {
padding-top: 8px;
height: 26px;

}
.page-title-wrap {
padding: 8px 0;
}

#access li:hover ul {
display: block;
margin-top: -25px;
padding-top: 5px;
}


Saturday, November 26, 2016

Juniper Firewall SRX240H Crashed with Error 'nearing maxproc limit by uid 0,please see tuning(7) and login.conf(5)'

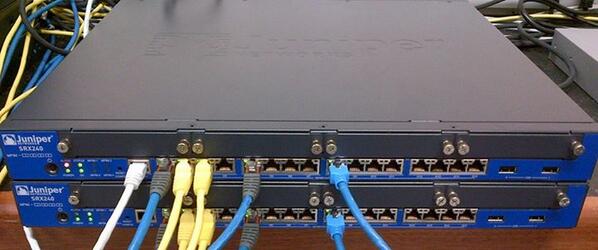
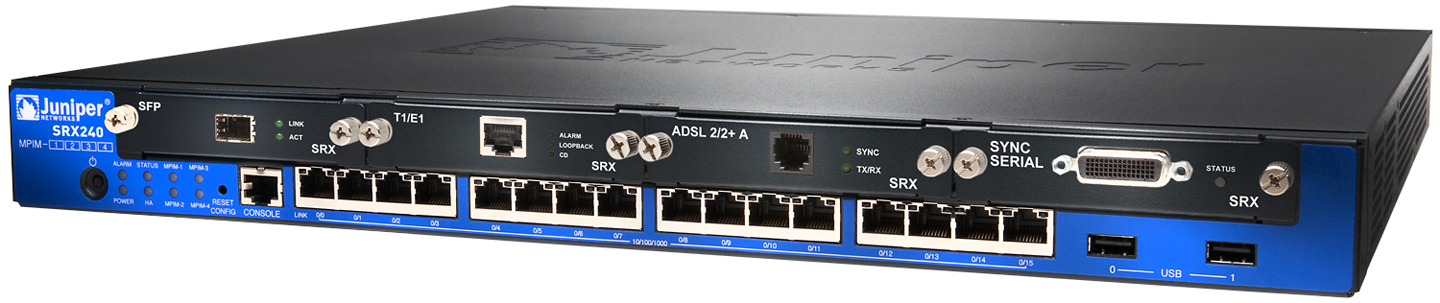
One of Juniper Firewall SRX240H had a serious crash. Manual reboot/shutdown did not work. To reset it, I would have to do a hard reset / power cycle device.

It would allow to log in from console, but you wont be able to see any configuration.

Here is outputs from this crashed Juniper SRX240H console:


{secondary:node0}
jonny@fw-1> show interfaces terse
Interface Admin Link Proto Local Remote
fxp0 up up
fxp0.0 up up inet 10.9.1.11/24
fxp1 up up
fxp1.0 up up inet 129.16.0.1/2
tnp 0x1100001
fxp2 up up
fxp2.0 up up tnp 0x1100001
gre up up
ipip up up
lo0 up up
lo0.16384 up up inet 127.0.0.1 --> 0/0
lo0.16385 up up inet 10.0.0.1 --> 0/0
10.0.0.16 --> 0/0
128.0.0.1 --> 0/0
128.0.0.4 --> 0/0
128.0.1.16 --> 0/0
lo0.32768 up up
lsi up up
mtun up up
pimd up up
pime up up
tap up up

{secondary:node0}
jonny@fw-1> show configuration
nearing maxproc limit by uid 0, please see tuning(7) and login.conf(5).
Process with Most Children- 0:swapper - Children - 60
Process with Most Children- 1:init - Children - 82
nearing maxproc limit by uid 0, please see tuning(7) and login.conf(5).
Process with Most Children- 1:init - Children - 82
nearing maxproc limit by uid 0, please see tuning(7) and login.conf(5).
Process with Most Children- 1:init - Children - 82
init died (signal 4, exit 0)
panic: Going nowhere without my init!
cpuid = 0
KDB: stack backtrace:
0x4afb64+0x20 (0x6,0,0x3f7eef10,0x4bef40) ra 0x4afb2c sz 0
0x4afaf0+0x3c (0x6,0,0x3f7eef10,0x4bef40) ra 0x4ae444 sz 32
0x4ae3c0+0x84 (0x6,0,0x3f7eef10,0x4bef40) ra 0x4453d4 sz 56
0x445360+0x74 (0x6,0,0x3f7eef10,0x4bef40) ra 0x445450 sz 40
0x445360+0xf0 (0x6,0,0x3f7eef10,0x4bef40) ra 0x44659c sz 40
0x446514+0x88 (0x6,0,0x3f7eef10,0x4bef40) ra 0x446cb8 sz 64
0x446c84+0x34 (0x6,0,0x3f7eef10,0x4bef40) ra 0x4b0724 sz 32
0x4b06e4+0x40 (0x6,0,0x3f7eef10,0x4bef40) ra 0x4b09e8 sz 40
0x4b0908+0xe0 (0x6,0,0x3f7eef10,0x4bef40) ra 0x4929d4 sz 32
0x492950+0x84 (0x6,0,0x3f7eef10,0x4bef40) ra 0x48d9d4 sz 48
0x48d8a8+0x12c (0x6,0,0x3f7eef10,0x4bef40) ra 0x4039e4 sz 3512
0x4039a8+0x3c (0x6,0x4d2608,0x3f7f0060,0x4bef40) ra 0x403e80 sz 40
0x403da0+0xe0 (0x6,0x4d2608,0x3f7f0060,0x4bef40) ra 0x3ffeefe0 sz 32
VA 0x3ffdefdc: not in user area or heuristics failed
_start+0xbfeeef00 (0x6,0x4d2608,0x3f7f0060,0x4bef40) ra 0 sz 0
pid 1, process: init
Uptime: 13m56s
Cannot dump. No dump device defined.
Ignoring watchdog timeout during boot/reboot
panic: Hardware watchdog timeout
cpuid = 0
Uptime: 16m19s
Cannot dump. No dump device defined.


NMI Exception on core:0
Watchdog status, core 0: 0xfffe6bffffb
FPA INT Summery: 0x0
Err EPC: 0x807c6d58
Trapframe Register Dump:
zero: 0000000000000000 at: fffffffffffffffe v0: 0000000000000001 v1: 000000000000000e
a0: 00000000000003e8 a1: 0000000000000001 a2: 00000000ffff8010 a3: 0000000010000010
t0: 00000000508008e1 t1: 0000000000000000 t2: 0000000004200029 t3: 0000000010000588
ta0: 0000000002000000 ta1: 0000000000000004 ta2: ffffffffc1cc3640 ta3: 0000000000000001
t8: 0000000023c34600 t9: 0000000008507580 s0: 000000000004f823 s1: 0000000038247ad4
s2: 00000000000927c0 s3: ffffffffc1cd0680 s4: ffffffff80c20000 s5: ffffffffd66a6ee8
s6: fffffffffffffffe s7: ffffffff80ae2d9c k0: 1a00000080c099e8 k1: 808042a80000000a
gp: ffffffff80c197b0 sp: ffffffffd66a6e78 s8: 0000000000000000 ra: ffffffff807c6d60
sr: 0000000050c808e5 mullo: 0000000005a0d200 mulhi: 0000000009600000
pc: ffffffff80a40bd8 cause: 0000000040008400 badvaddr: ffffffffc1d1a4d8
ErrPC: 0000000000000840
Current ticks/softticks 920517/824600, curproc [1] init
Core0: CacheErr(I/D: current: 0x7f7f0000000000/0x1130)

PCPU dump:
cpuid = 0
curthread = 0xc1ce0420: pid 1 "init"
ipis = 0x0
cpuid = 1
curthread = 0xc1ce5210: pid 21 "idle: cpu1"
ipis = 0x0
cpuid = 2
curthread = 0xc1ce5000: pid 20 "idle: cpu2"
ipis = 0x0
cpuid = 3
curthread = 0xc1ce1c60: pid 19 "idle: cpu3"
ipis = 0x0
cpuid = 4
curthread = none
ipis = 0x0
cpuid = 5
curthread = none
ipis = 0x0
cpuid = 6
curthread = none
ipis = 0x0
cpuid = 7
curthread = none
ipis = 0x0
cpuid = 8
curthread = none
ipis = 0x0
cpuid = 9
curthread = none
ipis = 0x0
cpuid = 10
curthread = none
ipis = 0x0
cpuid = 11
curthread = none
ipis = 0x0
Memory dump of 1024 words starting at 0x80000000
0x80000000: 082905e3 401a4000 00000000 800580e4
0x80000010: 80058148 800767f4 aaaaaaaa aaaaaaaa
0x80000020: aaaaaaaa aaaaaaaa aaaaaaaa aaaaaaaa
0x80000030: aaaaaaaa aaaaaaaa aaaaaaaa aaaaaaaa
0x80000040: aaaaaaaa aaaaaaaa aaaaaaaa aaaaaaaa
0x80000050: aaaaaaaa aaaaaaaa aaaaaaaa aaaaaaaa
0x80000060: aaaaaaaa aaaaaaaa aaaaaaaa aaaaaaaa
0x80000070: aaaaaaaa aaaaaaaa aaaaaaaa aaaaaaaa
0x80000080: 082905e3 401a4000 00000000 aaaaaaaa
0x80000090: aaaaaaaa aaaaaaaa aaaaaaaa aaaaaaaa
0x800000a0: aaaaaaaa aaaaaaaa aaaaaaaa aaaaaaaa
0x800000b0: aaaaaaaa aaaaaaaa aaaaaaaa aaaaaaaa
0x800000c0: aaaaaaaa aaaaaaaa aaaaaaaa aaaaaaaa
0x800000d0: aaaaaaaa aaaaaaaa aaaaaaaa aaaaaaaa
0x800000e0: aaaaaaaa aaaaaaaa aaaaaaaa aaaaaaaa
0x800000f0: aaaaaaaa aaaaaaaa aaaaaaaa aaaaaaaa
0x80000100: 3c1b80d5 277bae68 7c1a003b 001ad0c0
0x80000110: 035bd821 403ad801 ff7a0000 401a6000
0x80000120: 335a0002 17400005 00000000 3c1a80a4
0x80000130: 275a2af0 03400008 00000000 3c1a807e
0x80000140: 275a70b0 03400008 00000000 1000ffff
0x80000150: 00000000 42000018 aaaaaaaa aaaaaaaa
0x80000160: aaaaaaaa aaaaaaaa aaaaaaaa aaaaaaaa
0x80000170: aaaaaaaa aaaaaaaa aaaaaaaa aaaaaaaa
0x80000180: 401a6000 401b6800 335a0010 001ad0c0
0x80000190: 337b007c 037ad825 3c1a80c0 275a5130
0x800001a0: 035bd021 8f5a0000 00000000 03400008
0x800001b0: 00000000 aaaaaaaa aaaaaaaa aaaaaaaa
0x800001c0: aaaaaaaa aaaaaaaa aaaaaaaa aaaaaaaa
0x800001d0: aaaaaaaa aaaaaaaa aaaaaaaa aaaaaaaa
0x800001e0: aaaaaaaa aaaaaaaa aaaaaaaa aaaaaaaa
0x800001f0: aaaaaaaa aaaaaaaa aaaaaaaa aaaaaaaa
0x80000200: aaaaaaaa aaaaaaaa aaaaaaaa aaaaaaaa
0x80000210: aaaaaaaa aaaaaaaa aaaaaaaa aaaaaaaa
0x80000220: aaaaaaaa aaaaaaaa aaaaaaaa aaaaaaaa
0x80000230: aaaaaaaa aaaaaaaa aaaaaaaa aaaaaaaa
0x80000240: aaaaaaaa aaaaaaaa aaaaaaaa aaaaaaaa
0x80000250: aaaaaaaa aaaaaaaa aaaaaaaa aaaaaaaa
0x80000260: aaaaaaaa aaaaaaaa aaaaaaaa aaaaaaaa
0x80000270: aaaaaaaa aaaaaaaa aaaaaaaa aaaaaaaa
0x80000280: aaaaaaaa aaaaaaaa aaaaaaaa aaaaaaaa
0x80000290: aaaaaaaa aaaaaaaa aaaaaaaa aaaaaaaa
0x800002a0: aaaaaaaa aaaaaaaa aaaaaaaa aaaaaaaa
0x800002b0: aaaaaaaa aaaaaaaa aaaaaaaa aaaaaaaa
0x800002c0: aaaaaaaa aaaaaaaa aaaaaaaa aaaaaaaa
0x800002d0: aaaaaaaa aaaaaaaa aaaaaaaa aaaaaaaa
0x800002e0: aaaaaaaa aaaaaaaa aaaaaaaa aaaaaaaa
0x800002f0: aaaaaaaa aaaaaaaa aaaaaaaa aaaaaaaa
0x80000300: aaaaaaaa aaaaaaaa aaaaaaaa aaaaaaaa
0x80000310: aaaaaaaa aaaaaaaa aaaaaaaa aaaaaaaa
0x80000320: aaaaaaaa aaaaaaaa aaaaaaaa aaaaaaaa
0x80000330: aaaaaaaa aaaaaaaa aaaaaaaa aaaaaaaa
0x80000340: aaaaaaaa aaaaaaaa aaaaaaaa aaaaaaaa
0x80000350: aaaaaaaa aaaaaaaa aaaaaaaa aaaaaaaa
0x80000360: aaaaaaaa aaaaaaaa aaaaaaaa aaaaaaaa
0x80000370: aaaaaaaa aaaaaaaa aaaaaaaa aaaaaaaa
0x80000380: aaaaaaaa aaaaaaaa aaaaaaaa aaaaaaaa
0x80000390: aaaaaaaa aaaaaaaa aaaaaaaa aaaaaaaa
0x800003a0: aaaaaaaa aaaaaaaa aaaaaaaa aaaaaaaa
0x800003b0: aaaaaaaa aaaaaaaa aaaaaaaa aaaaaaaa
0x800003c0: aaaaaaaa aaaaaaaa aaaaaaaa aaaaaaaa
0x800003d0: aaaaaaaa aaaaaaaa aaaaaaaa aaaaaaaa
0x800003e0: aaaaaaaa aaaaaaaa aaaaaaaa aaaaaaaa
0x800003f0: aaaaaaaa aaaaaaaa aaaaaaaa aaaaaaaa
Stack trace:
DELAY+0x4c (0x3e8,0x1,0xffff8010,0x10000010) ra 0x80118764 sz 32
xpt_polled_action+0x64 (0x3e8,0x1,0xffff8010,0x10000010) ra 0x8011c93c sz 48
dashutdown+0xa0 (0x3e8,0x1,0xffff8010,0x10000010) ra 0x8023ac58 sz 664
boot+0xd48 (0x3e8,0x1,0xffff8010,0x10000010) ra 0x8023b910 sz 64
panic+0x8a8 (0x3e8,0x80d44dc8,0xffff8010,0x508008e1) ra 0x807df914 sz 72
panic_on_watchdog_timeout+0x78 (0x3e8,0x80d44dc8,0xffff8010,0x508008e1) ra 0x80804e2c sz 32
re_srxsme_watchdog_intr+0x158 (0x3e8,0x80d44dc8,0xffff8010,0x508008e1) ra 0x807b5068 sz 24
mips_handle_this_interrupt+0x8c (0x3e8,0x80d44dc8,0xffff8010,0x508008e1) ra 0x807b50fc sz 40
mips_handle_interrupts+0x60 (0x3e8,0x80d44dc8,0xffff8010,0x508008e1) ra 0x807b5528 sz 48
mips_interrupt+0x22c (0x3e8,0x80d44dc8,0xffff8010,0x508008e1) ra 0x80a420c4 sz 32
MipsKernIntr+0x140 (0x3e8,0x1,0xffff8010,0x10000010) ra 0x807c6d60 sz 368
DELAY+0x54 (0x3e8,0x1,0xffff8010,0x10000010) ra 0x80118764 sz 32
xpt_polled_action+0x64 (0x3e8,0x1,0xffff8010,0x10000010) ra 0x8011c93c sz 48
dashutdown+0xa0 (0x3e8,0x1,0xffff8010,0x10000010) ra 0x8023ac58 sz 664
boot+0xd48 (0x3e8,0x1,0xffff8010,0x10000010) ra 0x8023b910 sz 64
panic+0x8a8 (0x3e8,0x1,0xffff8010,0x3) ra 0x801f9930 sz 72
exit1+0x3dc (0x3e8,0x1,0xffff8010,0x3) ra 0x80245bf8 sz 80
sigexit+0x1814 (0x3e8,0x1,0xffff8010,0x3) ra 0x807c8aa8 sz 496
sendsig+0x51c (0x3e8,0x1,0xffff8010,0x3) ra 0x80246268 sz 528
sigexit+0x1e84 (0x3e8,0x1,0xffff8010,0x3) ra 0x4d2a84 sz 496
PC 0x4d2a84: not in kernel
uart_z8530_class+0x4d2a84 (0x3e8,0x1,0xffff8010,0x3) ra 0 sz 0
pid 1, process: init
Resetting the system now...
cpu_reset: Stopping other CPUs
timeout stopping cpus


U-Boot 1.1.6-JNPR-2.4 (Build time: Aug 31 2012 - 12:15:03)

SRX_240_HIGHMEM board revision major:2, minor:56, serial #: ACKF8991
OCTEON CN5230R-SCP pass 2.0, Core clock: 600 MHz, DDR clock: 333 MHz (666 Mhz data rate)
DRAM: 1024 MB
Starting Memory POST...
Checking datalines... OK
Checking address lines... OK
Checking 512K memory for U-Boot... OK.
Running U-Boot CRC Test... OK.
Flash: 4 MB
USB: scanning bus for devices...
Root Hub 0: 4 USB Device(s) found
Root Hub 1: 1 USB Device(s) found
scanning bus for storage devices... 2 Storage Device(s) found
Clearing DRAM........ done
BIST check passed.
1:00:00.0 Vendor/Device ID = 0x811210b5
1:01:07.0 Vendor/Device ID = 0xc72414e4
Boot Media: nand-flash usb
Net: octeth0
POST Passed
Press SPACE to abort autoboot in 1 seconds
ELF file is 32 bit
Loading .text @ 0x8f000078 (246924 bytes)
Loading .rodata @ 0x8f03c504 (13944 bytes)
Loading .rodata.str1.4 @ 0x8f03fb7c (16776 bytes)
Loading set_Xcommand_set @ 0x8f043d04 (100 bytes)
Loading .rodata.cst4 @ 0x8f043d68 (20 bytes)
Loading .data @ 0x8f044000 (5608 bytes)
Loading .data.rel.ro @ 0x8f0455e8 (120 bytes)
Loading .data.rel @ 0x8f045660 (136 bytes)
Clearing .bss @ 0x8f0456e8 (11656 bytes)
## Starting application at 0x8f000078 ...
Consoles: U-Boot console
Found compatible API, ver. 2.4

FreeBSD/MIPS U-Boot bootstrap loader, Revision 2.4
(builder@evenath.juniper.net, Fri Aug 31 12:18:02 UTC 2012)
Memory: 1024MB
[0]Booting from nand-flash slice 2
Un-Protected 1 sectors
writing to flash...
Protected 1 sectors
Loading /boot/defaults/loader.conf
/kernel data=0xb16d5c+0x134b2c syms=[0x4+0x8bbd0+0x4+0xcadc3]


Hit [Enter] to boot immediately, or space bar for command prompt.
Booting [/kernel]...
Kernel entry at 0x801000e0 ...
init regular console
Primary ICache: Sets 64 Size 128 Asso 4
Primary DCache: Sets 1 Size 128 Asso 64
Secondary DCache: Sets 512 Size 128 Asso 8
GDB: debug ports: uart
GDB: current port: uart
KDB: debugger backends: ddb gdb
KDB: current backend: ddb
kld_map_v: 0x8ff80000, kld_map_p: 0x0
Copyright (c) 1996-2016, Juniper Networks, Inc.
All rights reserved.
Copyright (c) 1992-2006 The FreeBSD Project.
Copyright (c) 1979, 1980, 1983, 1986, 1988, 1989, 1991, 1992, 1993, 1994
The Regents of the University of California. All rights reserved.
JUNOS 12.1X46-D55.3 #0: 2016-07-08 18:46:54 UTC
builder@quoarth.juniper.net:/volume/build/junos/12.1/service/12.1X46-D55.3/obj-octeon/junos/bsd/kernels/JSRXNLE/kernel
JUNOS 12.1X46-D55.3 #0: 2016-07-08 18:46:54 UTC
builder@quoarth.juniper.net:/volume/build/junos/12.1/service/12.1X46-D55.3/obj-octeon/junos/bsd/kernels/JSRXNLE/kernel
real memory = 1073741824 (1024MB)
avail memory = 509661184 (486MB)
FreeBSD/SMP: Multiprocessor System Detected: 4 CPUs
Security policy loaded: JUNOS MAC/pcap (mac_pcap)
Security policy loaded: JUNOS MAC/runasnonroot (mac_runasnonroot)
netisr_init: !debug_mpsafenet, forcing maxthreads from 4 to 1
cpu0 on motherboard
: CAVIUM's OCTEON 52XX CPU Rev. 0.8 with no FPU implemented
L1 Cache: I size 32kb(128 line), D size 8kb(128 line), sixty four way.
L2 Cache: Size 512kb, 8 way
obio0 on motherboard
uart0: <Octeon-16550 channel 0> on obio0
uart0: console (9600,n,8,1)
twsi0 on obio0
dwc0: <Synopsis DWC OTG Controller Driver> on obio0
usb0: <USB Bus for DWC OTG Controller> on dwc0
usb0: USB revision 2.0
uhub0: vendor 0x0000 DWC OTG root hub, class 9/0, rev 2.00/1.00, addr 1
uhub0: 1 port with 1 removable, self powered
uhub1: vendor 0x0409 product 0x005a, class 9/0, rev 2.00/1.00, addr 2
uhub1: single transaction translator
uhub1: 3 ports with 2 removable, self powered
umass0: STMicroelectronics ST72682 High Speed Mode, rev 2.00/2.10, addr 3
umass1: Kingston DataTraveler G3, rev 2.00/1.00, addr 4
dwc1: <Synopsis DWC OTG Controller Driver> on obio0
usb1: <USB Bus for DWC OTG Controller> on dwc1
usb1: USB revision 2.0
uhub2: vendor 0x0000 DWC OTG root hub, class 9/0, rev 2.00/1.00, addr 1
uhub2: 1 port with 1 removable, self powered
cpld0 on obio0
pcib1: <Cavium on-chip PCIe HOST bridge> on obio0
Disabling Octeon big bar support
PCIe: Waiting for port 0 to finish reset
PCIe: Port 0 link active, 2 lanes
PCIe: Waiting for port 1 to finish reset
PCIe: Port 1 link active, 1 lanes
pcib1: Initialized controller
pci0: <PCI bus> on pcib1
pcib2: <PCI-PCI bridge> irq 0 at device 0.0 on pci0
pci1: <PCI bus> on pcib2
pci1: <serial bus, USB> at device 2.0 (no driver attached)
pci1: <serial bus, USB> at device 2.1 (no driver attached)
pci1: <network> at device 7.0 (no driver attached)
pcib0: <Cavium on-chip PCIe HOST bridge> on obio0
pci2: <PCI bus> on pcib0
pci2: <processor> at device 0.0 (no driver attached)
gblmem0 on obio0
octpkt0: <Octeon RGMII> on obio0
cfi0: <AMD/Fujitsu - 4MB> on obio0
Timecounter "mips" frequency 600000000 Hz quality 0
###PCB Group initialized for udppcbgroup
###PCB Group initialized for tcppcbgroup
da1 at umass-sim1 bus 1 target 0 lun 0
da1: <Kingston DataTraveler G3 1.00> Removable Direct Access SCSI-0 device
da1: 40.000MB/s transfers
da1: 7639MB (15644912 512 byte sectors: 255H 63S/T 973C)
da0 at umass-sim0 bus 0 target 0 lun 0
da0: <ST ST72682 2.10> Removable Direct Access SCSI-2 device
da0: 40.000MB/s transfers
da0: 1000MB (2048000 512 byte sectors: 64H 32S/T 1000C)
Trying to mount root from ufs:/dev/da0s2a
WARNING: / was not properly dismounted
MFSINIT: Initialising MFSROOT
WARNING: / was not properly dismounted
Process-1 beginning MFSROOT initialization...
Creating MFSROOT...
/dev/md0: 20.0MB (40956 sectors) block size 16384, fragment size 2048
using 4 cylinder groups of 5.00MB, 320 blks, 640 inodes.
super-block backups (for fsck -b #) at:
32, 10272, 20512, 30752
Populating MFSROOT...
Creating symlinks...
Setting up mounts...
Continuing boot from MFSROOT...
Attaching /cf/packages/junos via /dev/mdctl...
Mounted junos package on /dev/md1...
N
WARNING: R/W mount of /cf/var denied. Filesystem is not clean - run fsck
mount/dev/bo0s3f : Operation not permitted
chflags: /var/packages/*: No such file or directory
umount: /dev/bo0s3f: unknown file system
Media check on da0
Automatic reboot in progress...
** /dev/da0s2a (NO WRITE)
** Last Mounted on /
** Root file system
** Phase 1 - Check Blocks and Sizes
** Phase 2 - Check Pathnames
** Phase 3 - Check Connectivity
** Phase 4 - Check Reference Counts
** Phase 5 - Check Cyl groups
500 files, 78381 used, 71657 free (17 frags, 8955 blocks, 0.0% fragmentation)
mount reload of '/' failed: Operation not supported

Verified junos signed by PackageProductionEc_2016 method ECDSA
Verified jboot signed by PackageProductionEc_2016 method ECDSA
Verified junos-12.1X46-D55.3-domestic signed by PackageProductionEc_2016 method ECDSA
Checking integrity of BSD labels:
s1: Passed
s2: Passed
s3: Passed
s4: Passed
** /dev/bo0s3e
** Last Mounted on /config
** Phase 1 - Check Blocks and Sizes
** Phase 2 - Check Pathnames
** Phase 3 - Check Connectivity
** Phase 4 - Check Reference Counts
** Phase 5 - Check Cyl groups
17 files, 52 used, 12386 free (26 frags, 1545 blocks, 0.2% fragmentation)

***** FILE SYSTEM MARKED CLEAN *****
** /dev/bo0s3f
** Last Mounted on /cf/var
** Phase 1 - Check Blocks and Sizes
PARTIALLY TRUNCATED INODE I=141
SALVAGE? yes

** Phase 2 - Check Pathnames
** Phase 3 - Check Connectivity
** Phase 4 - Check Reference Counts
UNREF FILE I=22702 OWNER=0 MODE=100660
SIZE=245770 MTIME=Nov 21 16:32 2016
CLEAR? yes

UNREF FILE I=22715 OWNER=0 MODE=100660
SIZE=262144 MTIME=Nov 21 16:32 2016
CLEAR? yes

** Phase 5 - Check Cyl groups
FREE BLK COUNT(S) WRONG IN SUPERBLK
SALVAGE? yes

SUMMARY INFORMATION BAD
SALVAGE? yes

BLK(S) MISSING IN BIT MAPS
SALVAGE? yes

2251 files, 109315 used, 66003 free (379 frags, 8203 blocks, 0.2% fragmentation)

***** FILE SYSTEM MARKED CLEAN *****

***** FILE SYSTEM WAS MODIFIED *****
Checking integrity of licenses:
JUNOS476910.lic: Passed
JUNOS476950.lic: Passed
JUNOS638415.lic: Passed
JUNOS649298.lic: Passed
JUNOS859875.lic: No recovery data
Checking integrity of configuration:
rescue.conf.gz: Passed
cd: can't cd to /etc/db/pkg
Loading configuration ...
Time and ticks drifted too much, resetting synchronization...
IDP policy daemon: [edit security idp idp-policy Space-IPS-Policy rulebase-ips rule 1 match]
IDP policy daemon: 'attacks'
IDP policy daemon: Please install the Signature Database
IDP policy daemon:
mgd: error: configuration check-out failed
Warning: Commit failed, activating partial configuration.
Warning: Edit the router configuration to fix these errors.
Setting initial options: .
Starting optional daemons: usbd.
Doing initial network setup:.
Initial interface configuration:
additional daemons: eventd.
Additional routing options:kern.module_path: /boot//kernel;/boot/modules -> /boot/modules;/modules/ifpfe_drv;/modules;
kld netpfe drv: ifpfed_dialer ipsec kld.
Doing additional network setup:.
Starting final network daemons:.
setting ldconfig path: /usr/lib /opt/lib
ldconfig: warning: /opt/lib: No such file or directory
starting standard daemons: cron.
Initial rc.mips initialization:.
Local package initialization:.
starting local daemons:set cores for group access
.
kern.securelevel: -1 -> 1
Creating JAIL MFS partition...
JAIL MFS partition created
boot.upgrade.uboot="0xBFC00000"
boot.upgrade.loader="0xBFE00000"
Boot media /dev/da0 has dual root support
ERROR: cannot mount /dev/da0s2a
** /dev/da0s1a
FILE SYSTEM CLEAN; SKIPPING CHECKS
clean, 71145 free (89 frags, 8882 blocks, 0.1% fragmentation)
Mon Nov 21 16:39:14 UTC 2016

fw-1 (ttyu0)

login: jonny
Password:

--- JUNOS 12.1X46-D55.3 built 2016-07-08 18:46:54 UTC
could not open user interface connection: management daemon not responding
Retry connection attempts ? [yes,no] (yes)
CLI Output END

After system crashed, it will do a reboot by itself, but it will get back into Bad_Page_Fault error then reboot itself again.


BAD_PAGE_FAULT: pid 1 (init), uid 0: pc 0x48d8dc got a write fault at 0x3f7ee3d0
Trapframe Register Dump:
zero: 0000000000000000 at: 0000000000000001 v0: 000000000051d748 v1: 000000000051d730
a0: 0000000000000000 a1: 00000000004cb298 a2: 000000003f7ef19c a3: 00000000004bef40
t0: 0000000000000009 t1: 0000000000000000 t2: 0000000000000004 t3: 0000000000000000
ta0: 0000000001ab2600 ta1: 0000000000000009 ta2: 0000000000000020 ta3: 000000000056f042
t8: 000000000056f034 t9: 000000000048d8a8 s0: 0000000000000006 s1: 00000000004d2a84
s2: 000000000000096f s3: 000000003f7f0268 s4: 0000000000000000 s5: 000000003f7f02ec
s6: 0000000000000019 s7: 0000000000000009 k0: 0000000000000000 k1: 0000000000000000
gp: 0000000000544f80 sp: 000000003f7ee3b8 s8: 0000000000564a80 ra: 00000000004039e4
sr: 0000000050808cf3 mullo: 0000000066666667 mulhi: 0000000000000000
pc: 000000000048d8dc cause: 000000000000000c badvaddr: 000000003f7ee3d0
Page table info for pc address 0x48d8dc: pte = 0x4032b45a
Dumping 4 words starting at pc address 0x48d8dc:
afbc0018 00808021 00a09821 2402fc00
cpuid = 0
BAD_PAGE_FAULT: pid 1 (init), uid 0: pc 0x48d8dc got a write fault at 0x3f7ee3d0
Trapframe Register Dump:
zero: 0000000000000000 at: 0000000000000001 v0: 000000000051d748 v1: 000000000051d730
a0: 0000000000000000 a1: 00000000004cb298 a2: 000000003f7ef19c a3: 00000000004bef40
t0: 0000000000000009 t1: 0000000000000000 t2: 0000000000000004 t3: 0000000000000000
ta0: 0000000001ab2600 ta1: 0000000000000009 ta2: 0000000000000020 ta3: 000000000056f042
t8: 000000000056f034 t9: 000000000048d8a8 s0: 0000000000000006 s1: 00000000004d2a84
s2: 000000000000096f s3: 000000003f7f0268 s4: 0000000000000000 s5: 000000003f7f02ec
s6: 0000000000000019 s7: 0000000000000009 k0: 0000000000000000 k1: 0000000000000000
gp: 0000000000544f80 sp: 000000003f7ee3b8 s8: 0000000000564a80 ra: 00000000004039e4
sr: 0000000050808cf3 mullo: 0000000066666667 mulhi: 0000000000000000
pc: 000000000048d8dc cause: 000000000000000c badvaddr: 000000003f7ee3d0
Page table info for pc address 0x48d8dc: pte = 0x4032b45a
Dumping 4 words starting at pc address 0x48d8dc:
afbc0018 00808021 00a09821 2402fc00
cpuid = 0


From another cluster member which is working normal, you will see some cluster status. 

{primary:node1}
admin@fw-2>
show chassis cluster status
Monitor Failure codes:
CS Cold Sync monitoring FL Fabric Connection monitoring
GR GRES monitoring HW Hardware monitoring
IF Interface monitoring IP IP monitoring
LB Loopback monitoring MB Mbuf monitoring
NH Nexthop monitoring NP NPC monitoring
SP SPU monitoring SM Schedule monitoring

Cluster ID: 1
Node Priority Status Preempt Manual Monitor-failures

Redundancy group: 0 , Failover count: 1
node0 200 secondary no no None
node1 100 primary no no None

Redundancy group: 1 , Failover count: 1
node0 0 hold yes no IF CS
node1 0 primary yes no CS

{primary:node1}
admin@fw-2>


After show it to JTAC, it was RMA-ed.