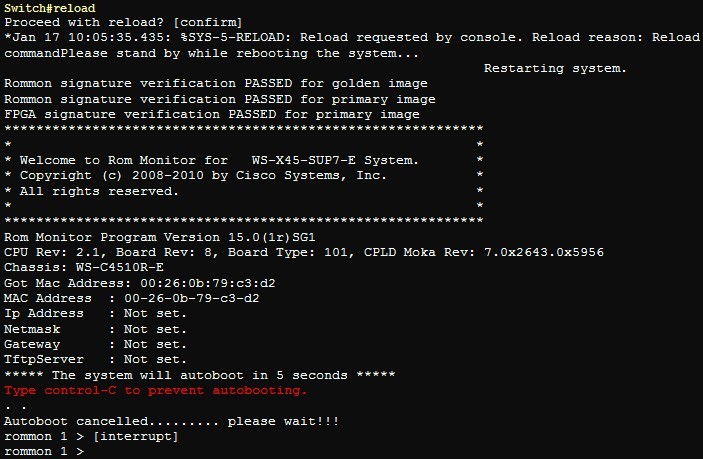
 Cisco Switch usually is quite robust and not give me hard time. When it happens, it happens. What I met is a situation Cisco 4500 switch got into Rommon mode and I have to find a quickest way to get in back in production before the maintenance window ends.
The related posts in this blog:
- Recover Cisco Device using TFTP Server or External Card from a Corrupt or Missing Image or in Rommon Mode
- Recover Cisco 4507 Switch from a Continuous Reboot
1. Why in ROMmon Mode
Here are some reasons why switch could wind up in ROMmon mode from Cisco doc:
- A switch reload or crash after the image was corrupted or deleted. See the Recover from a Corrupt or Missing Image section of this document for more information.
- The Compact Flash which holds the system image has been removed. See the Recover from a Continuous Reboot section of this document to determine if a valid system image is present in the bootflash:. If there is no file present, see the Recover from a Corrupt or Missing Image section of this document
- The configuration register has been changed incorrectly. The configuration register value of 0x0 always brings the switch to ROMmon mode. The typical configuration register is 0x2102, with the boot system flash command pointing to the system image to load. Refer to this document for more information about the configuration register:The Configuring the Software Configuration Register section of Configuring the Catalyst 4000 Family Switch for the First Time.
- The boot variable is incorrect, but a valid image is still present. See the Recover from a Continuous Reboot section of this document for more information.
These primary symptoms occur in your network if the switch is in ROMmon mode:
- Routing failures occur because ROMmon mode cannot route between VLAN interfaces, and is only designed to recover the switch.
- If you try to Telnet to any of the interfaces it fails, and if you are connected to the console port of the Supervisor, you see this prompt:
 *********************************************************
 *                                                       *
 * ROMMON configuration is being initialized to default  *
 * values. This may be because it was never initialized. *
 *                                                       *
 *********************************************************


Verifying FPGA (P) Signature ....................... PASSED
flash0:/codesign/fpga.dat open failure

Verifying ROMMON (P) Signature ......... PASSED
flash0:/codesign/rm1.dat open failure


************************************************************
*                                                          *
* Rom Monitor                                              *
* Copyright (c) 2012-2013 by Cisco Systems, Inc.           *
* All rights reserved.                                     *
*                                                          *
************************************************************

Rom Monitor (P) Version 15.1(1r)SG1
Compiled Wed 14-Aug-13 17:15 [RLS]

System       : WS-X45-SUP8-E  Slot [5]
Chassis      : WS-C4510R*E    Mod  [1][2][3][4][7][8][9][10]
Revision     : CPU 2.0   BOARD 4.0   FPGA 3.15F2.9155
Memory       : 4096 MB
Date         : Sun Jul 17 19:41:37 2016


 Type Control-C to prevent autobooting....
 config-register = 0x102
 Autobooting using BOOT variable specified file.....

 Could not find a valid file in BOOT environment variable.
 BOOT variable can be set from IOS. To find currently set
 Rom Monitor variables, please type 'set' command.

 For help on choosing a boot method,  type 'confreg' command.
rommon 0 >
2. Recover from TFTP Server
2.1 Connect Mgmt port on Cisco 4500 to your machine which Tftp server is running on.
2.2 Configure Mgmt Port on Cisco 4500 with ip address 10.10.10.10. Put right IOS file (for example 4500.bin) under tftp server root folder.
2.3 Configure your machine which TFTP is running on with ip address 10.10.10.1
2.4 Confirm connectivity with ping
2.5 bott tftp://10.10.10.1/4500.bin
rommon 4 >ping 10.10.10.10
Pinging 10.10.10.10
!!!!
10.10.10.10 is alive!
rommon 5 >ping 10.10.10.1
Pinging 10.10.10.1
!!!!
10.10.10.1 is alive!
rommon 6 >boot tftp://10.10.10.1/4500.bin
Link Speed   : 1Gb Full Duplex
Filename     : /4500.bin
IpAddress    : 10.10.10.10
TftpServer   : 10.10.10.1
!!!!!!TFTP: Session Timed Out....

rommon 7 >dir

 usage: dir { [ bootflash: ] | [ slot0: ] | [ usb0: ] }
rommon 8 >set
 PS1=rommon ! >
 RommonVer=15.1(1r)SG1
 ConfigReg=0x0102
 IpAddr=10.10.10.10
 Netmask=255.255.255.0
 BootedFileName=tftp://10.10.10.1/4500.bin

rommon 10 >?
 alias              show/set aliases command
 arp                show arp table
 boot               boot an executable image
 clear              clear misc. configurations
 confreg            configuration register setup
 date               display the current date and time
 dev                list the storage device table
 dir                list files in a storage device
 ethstat            management ethernet packet count
 history            monitor command history
 md5                compute md5 sum of a file
 ping               ping utility for IP/network connectivity
 reset              reset system
 set                show/set rommon/environment variable(s)
 unalias            unset an alias
 unset              unset rommon/environment variable(s)
 version            display rommon version information
rommon 11 >boot ?
 Invalid filename ?. It must begin with device name.
 Type 'boot -help' for details.
rommon 12 >boot tftp ?
Link Speed   : 1Gb Full Duplex
Filename     : tftp
IpAddress    : 10.10.10.10
TftpServer   : 0.0.0.0
 [CTRL-C]
rommon 13 >boot -help
 usage: boot [-adhv] [filename]
 -a display help on autoboot and BOOT variable setup
 -d display detailed help message
 -help display this message
 -v  verbose

Examples:
 boot
   - boots the first file from internal flash.

 boot bootflash:ios
   - boots file "ios" from internal flash device.

 boot slot0:ios
   - boots file "ios" from compact flash device.

 boot tftp://10.1.1.5/tftpboot/ios
   - boots file "/tftpboot/ios" from tftp server
     10.1.1.5 through the management interface (also called
     "fa1 interface") using tftp file transfer protocol.

 Type 'boot -d' for detailed help, including help on
 netload mechanism and BOOTLDR program.

rommon 14 >dev
 No USB storage device detected!
 No SD storage device detected!

 Device Table
 ============
 Logical Physical Partition Status Begin    Size     Drive
 Number  Number   Number           sector   in Kb    Name
 ------- -------- --------- ------ -------- -------- --------
       0        0         0      0        0        0 flash0:
       1        0         1      0        0        0 flash1:
       2        0         2      0        0        0 flash2:
       3        0         3      0        0        0 flash3:
       4        0         4      0        0        0 flash4:
       5        0         5      0        0        0 flash5:
       6        1         0      0        0        0 slot0:
       7        2         0      0        0        0 usb0:
rommon 15 >boot tftp://10.10.10.1/4500.bin
Link Speed   : 1Gb Full Duplex
Filename     : /4500.bin
IpAddress    : 10.10.10.10
TftpServer   : 10.10.10.1
!!!!!TFTP: Session Timed Out....
 The boot from TFTP server failed because of session timed out.
3. Recover from SD card in slot0
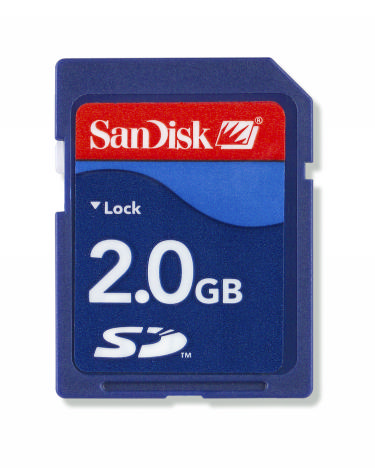
Cisco Catalyst 4500E Supervisor Engine support external USB and Secure Digital (SD) card for flexible storage options. You wont be able to use new fast speed SD card. Cisco is selling this kind SD for more than $400. But it wont cost you more than $50 if you buy it from eBay or Amazon.
SD-X45-2GB-E | |
3.1 Copy correct IOS file to SD card
SWTEST#format slot0: FAT16
Format operation may take a while. Continue? [confirm]
Format operation will destroy all data in "slot0:".  Continue? [confirm]
Format of slot0 complete
SWTEST#copy bootflash:?
bootflash:cat4500es8-universalk9.SPA.03.03.00.XO.151-1.XO.bin
bootflash:cat4500es8-universalk9.SPA.03.03.01.XO.151-1.XO1.bin

SWTEST#copy bootflash:cat4500es8-universalk9.SPA.03.03.01.XO.151-1.XO1.bin slot0:
Destination filename [cat4500es8-universalk9.SPA.03.03.01.XO.151-1.XO1.bin]?
Copy in progress...CCCCCCCCCCCCCCCCCCCCCCCCCCCCCCCCCCCCCCCCCCCCCCCCCCCCCCCCCCCCCCCCCCCCCCCCCCCCCCCCCCCCCCCCCCCCCCCCCCCCCCCCCCCCCCCCCCCCCCCCCCCCCCCCCCCCCCCCCCCCCCCCCCCCCCCCCCCCCCCCCCCCCCCCCCCCCCCCCCCCCCCCCCCCCCCCCCCCCCCCCCCCCCCCCCCCCCCCCCCCCCCCCCCCCCCCCCCCCCCCCCCCCCCCCCCCCCCCCCCCCCCCCCCCCCCCCCCCCCCCCCCCCCCCCCCCCCCCCCCCCCCCCCCCCCCCCCCCCCCCCCCCCCCCCCCCCCCCCCCCCCCCCCCCCCCCCCCCCCCCCCCCCCCCCCCCCCCCCCCCCCCCCCCCCCCCCCCCCCCCCCCCCCCCCCCCCCCCCCCCCCCCCCCCCCCCCCCCCCCCCCCCCCCCCCCCCCCCCCCCCCCCCCCCCCCCCCCCCCCCCCCCCCCCCCCCCCCCCCCCCCCCCCCCCCCCCCCCCCCCCCCCCCCCCCCCCCCCCCCCCCCCCCCCCCCCCCCCCCCCCCCCCCCCCCCCCCCCCCCCCCCCCCCCCCCCCCCCCCCCCCCCCCCCCCCCCCCCCCCCCCCCCCCCCCCCCCCCCCCCCCCCCCCCCCCCCCCCCCCCCCCCCCCCCCCCCCCCCCCCCCCCCCCCCCCCCCCCCCCCCCCCCCCCCCCCCCCCCCCCCCCCCCCCCCCCCCCCCCCCCCCCCCCCCCCCCCCCCCCCCCCCCCCCCCCCCCCCCCCCCCCCCCCCCCCCCCCCCCCCCCCCCCCCCCCCCCCCCCCCCCCCCCCCCCCCCCCCCCCCCCCCCCCCCCCCCCCCCCCCCCCCCCCCCCCCCCCCCCCCCCCCCCCCCCCCCCCCCCCCCCCCCCCCCCCCCCCCCCCCCCCCCCCCCCCCCCCCCCCCCCCCCCCCCCCCCCCCCCCCCCCCCCCCCCCCCCCCCCCCCCCCCCCCCCCCCCCCCCCCCCCCCCCCCCCCCCCCCCCCCCCCCCCCCCCCCCCCCCCCCCCCCCCCCCCCCCCCCCCCCCCCCCCCCCCCCCCCCCCCCCCCCCCCCCCCCCCCCCCCCCCCCCCCCCCCCCCCCCCCCCCCCCCCCCCCCCCCCCCCCCCCCCCCCCCCCCCCCCCCCCCCCCCCCCCCCCCCCCCCCCCCCCCCCCCCCCCCCCCCCCCCCCCCCCCCCCCCCCCCCCCCCCCCCCCCCCCCCCCCCCCCCCCCCCCCCCCCCCCCCCCCCCCCCCCCCCCCCCCCCCCCCCCCCCCCCCCCCCCCCCCCCCCCCCCCCCCCCCCCCCCCCCCCCCCCCCCCCCCCCCCCCCCCCCCCCCCCCCCCCCCCCCCCCCCCCCCCCCCCCCCCCCCCCCCCCCCCCCCCCCCCCCCCCCCCCCCCCCCCCCCCCCCCCCCCCCCCCCCCCCCCCCCCCCCCCCCCCCCCCCCCCCCCCCCCCCCCCCCCCCCCCCCCCCCCCCCCCCCCCCCCCCCCCCCCCCCCCCCCCCCCCCCCCCCCCCCCCCCCCCCCCCCCCCCCCCCCCCCCCCCCCCCCCCCCCCCCCCCCCCCCCCCCCCCCCCCCCCCCCCCCCCCCCCCCCCCCCCCCCCCCCCCCCCCCCCCCCCCCCCCCCCCCCCCCCCCCCCCCCCCCCCCCCCCCCCCCCCCCCCCCCCCCCCCCCCCCCCCCCCCCCCCCCCCCCCCCCCCCCCCCCCCCCCCCCCCCCCCCCCCCCCCCCCCCCCCCCCCCCCCCCCCCCCCCCCCCCCCCCCCCCCCCCCCCCCCCCCCCCCCCCCCCCCCCCCCCCCCCCCCCCCCCCCCCCCCCCCCCCCCCCCCCCCCCCCCCCCCCCCCCCCCCCCCCCCCCCCCCCCCCCCCCCCCCCCCCCCCCCCCCCCCCCCCCCCCCCCCCCCCCCCCCCCCCCCCCCCCCCCCCCCCCCCCCCCCCCCCCCCCCCCCCCCCCCCCCCCCCCCCCCCCCCCCCCCCCCCCCCCCCCCCCCCCCCCCCCCCCCCCCCCCCCCCCCCCCCCCCCCCCCCCCCCCCCCCCCCCCCCCCCCCCCCCCCCCCCCCCCCCCCCCCCCCCCCCCCCCCCCCCCCCCCCCCCCCCCCCCCCCCCCCCCCCCCCCCCCCCCCCCCCCCCCCCCCCCCCCCCCCCCCCCCCCCCCCCCCCCCCCCCCCCCCCCCCCCCCCCCCCCCCCCCCCCCCCCCCCCCCCCCCCCCCCCCCCCCCCCCCCCCCCCCCCCCCCCCCCCCCCCCCCCCCCCCCCCCCCCCCCCCCCCCCCCCCCCCCCCCCCCCCCCCCCCCCCCCCCCCCCCCCCCCCCCCCCCCCCCCCCCCCCCCCCCCCCCCCCCCCCCCCCCCCCCCCCCCCCCCCCCCCCCCCCCCCCCCCCCCCCCCCCCCCCCCCCCCCCCCCCCCCCCCCCCCCCCCCCCCCCCCCCCCCCCCCCCCCCCCCCCCCCCCCCCCCCCCCCCCCCCCCCCCCCCCCCCCCCCCCCCCCCCCCCCCCCCCCCCCCCCCCCCCCCCCCCCCCCCCCCCCCCCCCCCCCCCCCCCCCCCCCCCCCCCCCCCCCCCCCCCCCCCCCCCCCCCCCCCCCCCCCCCCCCCCCCCCCCCCCCCCCCCCCCCCCCCCCCCCCCCCCCCCCCCCCCCCCCCCCCCCCCCCCCCCCCCCCCCCCCCCCCCCCCCCCCCCCCCCCCCCCCCCCCCCCCCCCCCCCCCCCCCCCCCCCCCCCCCCCCCCCCCCCCCCCCCCCCCCCCCCCCCCCCCCCCCCCCCCCCCCCCCCCCCCCCCCCCCCCCCCCCCCCCCCCCCCCCCCCCCCCCCCCCCCCCC
185800924 bytes copied in 46.880 secs (3963330 bytes/sec)
SWTEST#
3.2 Boot Failed device from ROMmon mode with SD card
rommon 0 >boot slot0:cat4500es8-universalk9.SPA.03.03.01.XO.151-1.XO1.bin
Loading image !!!!!!!!!!!!!!!!!!!!

 Checking digital signature....
 [slot0:cat4500es8-universalk9.SPA.03.03.01.XO.151-1.XO1.bin]
 Digitally Signed Release Software with key version A

flash0:/codesign/ios.dat open failure

Rommon reg: 0x00084F80
Reset2Reg: 0x0CB00000

Image load status: 0x00000000
########
 Conan controller 0x0498FA9B..0x04C268B4 Size:0x00CAC5EC @
####
 Radtrooper controller 0x047F3F00..0x0498FA9A Size:0x00661EDC @
 Link: 0x00000080-0x16000000
 Program Done!
##############################
Freescale FM module (Jul 31 2013:13:42:18)
Starting System Services
Calculating module dependencies ...
RTNETLINK answers: Invalid argument
Jul 17 19:44:55 %IOSXE-2-PLATFORM: process kernel: Freescale FM module (Jul 31 2                                                                                    013:13:42:18)
Jul 17 19:44:55 %IOSXE-3-PLATFORM: process kernel: PME2: fsl_pme2_db_init: not o                                                                                    n ctrl-plane
No Mountpoints DefinedJul 17 19:44:58 %IOSXE-3-PLATFORM: process sshd[4657]: err                                                                                    or: Bind to port 22 on :: failed: Address already in use.

diagsk10-post version 6.1.0.0

prod: WS-X45-SUP8-E part: 73-14915-04 serial: CAT1746L7AQ


Power-on-self-test for Module 5: WS-X45-SUP8-E

CPU Subsystem Tests ...
 seeprom: Pass

Traffic: L3 Loopback ...
 Test Results: Pass

Traffic: L2 Loopback ...
 Test Results: Pass
post done
Exiting to ios...
Loading virtuclock as vuclock
Loading gsbu64atomic as gdb64atomic
Loading gsbu64atomic
Starting IOS Services
AIPC Module Loaded...
Platform Manager: acquire hwlock chassis()
Platform Manager: starting in standalone mode

              Restricted Rights Legend

Use, duplication, or disclosure by the Government is
subject to restrictions as set forth in subparagraph
(c) of the Commercial Computer Software - Restricted
Rights clause at FAR sec. 52.227-19 and subparagraph
(c) (1) (ii) of the Rights in Technical Data and Computer
Software clause at DFARS sec. 252.227-7013.

           cisco Systems, Inc.
           170 West Tasman Drive
           San Jose, California 95134-1706


Cisco IOS Software, IOS-XE Software, Catalyst 4500 L3 Switch Software (cat4500es                                                                                    8-UNIVERSALK9-M), Version 03.03.01.XO RELEASE SOFTWARE (fc1)
Technical Support: http://www.cisco.com/techsupport
Copyright (c) 1986-2014 by Cisco Systems, Inc.
Compiled Wed 30-Apr-14 02:55 by prod_rel_team

Cisco IOS-XE software, Copyright (c) 2005-2013 by cisco Systems, Inc.
All rights reserved.  Certain components of Cisco IOS-XE software are
licensed under the GNU General Public License ("GPL") Version 2.0.  The
software code licensed under GPL Version 2.0 is free software that comes
with ABSOLUTELY NO WARRANTY.  You can redistribute and/or modify such
GPL code under the terms of GPL Version 2.0.  For more details, see the
documentation or "License Notice" file accompanying the IOS-XE software,
or the applicable URL provided on the flyer accompanying the IOS-XE
software.


This product contains cryptographic features and is subject to United
States and local country laws governing import, export, transfer and
use. Delivery of Cisco cryptographic products does not imply
third-party authority to import, export, distribute or use encryption.
Importers, exporters, distributors and users are responsible for
compliance with U.S. and local country laws. By using this product you
agree to comply with applicable laws and regulations. If you are unable
to comply with U.S. and local laws, return this product immediately.

A summary of U.S. laws governing Cisco cryptographic products may be found at:
http://www.cisco.com/wwl/export/crypto/tool/stqrg.html

If you require further assistance please contact us by sending email to
export@cisco.com.

cisco WS-C4510R+E (P5040) processor (revision 2) with 4194304K bytes of physical memory.
Processor board ID FXS1749Q1L6
P5040 CPU at 2.2GHz, Supervisor 8-E
Last reset from Reload
1 Virtual Ethernet interface
288 Gigabit Ethernet interfaces
32 Ten Gigabit Ethernet interfaces
511K bytes of non-volatile configuration memory.

 ctspPeerPolicyUpdatedNotif notification is disabled.
 ctspAuthorizationSgaclFailNotif notification is disabled.


Press RETURN to get started!


User Access Verification

Username:
Reference:
1. Recover a Cisco IOS Catalyst 4500/4000 Series Switch from a Corrupt or Missing Image or in Rommon Mode